I have long been convinced that smoked ribs are the most underappreciated of the BBQ meats. Especially when it comes to home barbecue.
It’s not that folks don’t enjoy eating ribs. You can find spare ribs or baby backs on restaurant menus across the country. But when it comes to firing-up a smoker, novice pitmasters usually opt for chicken, brisket or pulled pork. Ribs seem to be the black sheep of the backyard BBQ family.
The reason, I think, for this phenomenon is that it’s a bit tricky to make great ribs. Unlike the other smoked meats, you can’t just toss a thermometer in a rack of ribs and cook’em until they reach an ideal temperature. If you want to avoid dry, tough or overcooked meat you’ll need to start with a foolproof method for making ribs.
Contents
What is the 3-2-1 Ribs Method?
There are two things that often go wrong when you’re barbecuing a rack of ribs on a pellet grill or smoker. The 3-2-1 method is the solution to both of these problems!
The most common problem with smoked ribs is that they can dry out, leaving your meat with the texture of jerky. On the opposite side, some folks cook their racks beyond the ideal point until the meat is literally falling from the rib bones. These overcooked racks may resemble stewed meat more than BBQ.
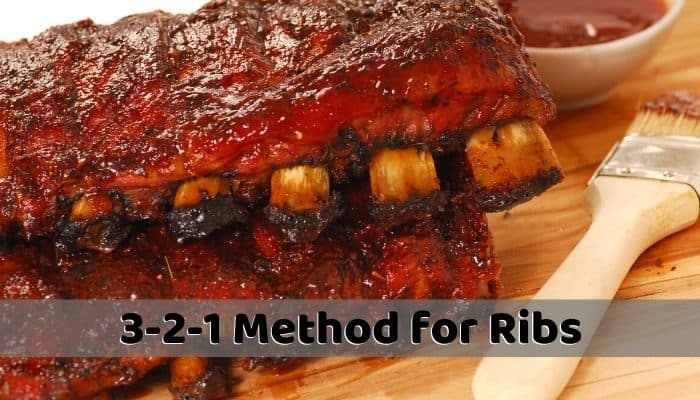
The 3-2-1 method for making ribs is named for the timing of each cooking stage. Put simply, to use this method you:
- Smoke your rack of ribs for 3 hours.
- Wrap the rack tightly in foil and return to the smoker for 2 hours.
- Unwrap and continue cooking on the smoker for another hour, glazing with a BBQ sauce for the last 20 minutes.
This method has a lot of things going for it. It’s easy to remember the timing of the stages, so you won’t have to bother looking up directions mid-BBQ. The method is ideal for most smokers and pellet grills. You can even start a rack in your charcoal or gas grill using a smoker insert and finish it in your oven.
Before You Start
I’ve said it before but it bears repeating. Smoking meat is as much an art as it is a science. Your results will vary depending on your preparation, your choice of meat and how you season your rack.
Pick the Best Ribs – Spare vs Baby Back
What’s the best kind of meat for the 3-2-1 ribs method?
This method is really ideal for pork ribs, either spare ribs or baby backs. If you’re making another type of ribs, such as beef or lamb, you’ll want to tweak the timing of things accordingly. You can read more about the variations in this method below.
So what’s the difference between spare and baby back ribs, and is one better than the other for backyard smoking? Honestly, while the cuts have different properties they are both excellent options for smoking with the 3-2-1 method.
Spare ribs are well marbled with fat and are known for their deep, porky flavor. The higher fat content makes these ribs a bit easier to cook since the meat won’t dry out on the smoker as quickly as baby backs. The longer, flatter bones are a bit easier to eat and have a lot of meat between each rib.
Baby back ribs have less fat than their spare cousins and have more meat on the top of the rib bones. So they are a healthier option for backyard cooking, and the meat picks up a lot of flavor from the woodsmoke. The downside to making baby backs with the 3-2-1 method is they can turn out rather dry if you’re not careful.
Remove the Rib Membrane
Unless you’re ordering your rack from a butcher, you’ll likely need to remove the rib membrane before you can start cooking.
While this isn’t an essential step, removing the tough membrane from the underside of the rib bones will allow your rack to develop more flavor on the smoker. The membrane does not cook up tasty, and most folks peel it off their individual ribs anyway.
When you remove this membrane before you smoke your ribs, the meat on the underside of the rack comes into direct contact with your seasonings and smoke. So your rack will have a deeper and richer flavor that won’t get peeled away uneaten.
It will also be easier to eat your ribs when this membrane is removed prior to smoking. Your guests won’t have to bite through an inedible layer as they dive into their meal!
Rub that Flavor In!
The very best BBQ meats have layers of flavor. While a BBQ sauce is an optional and dandy way to finish a rack of ribs, for a deeper flavor you need more than woodsmoke and sauce. You gotta use a dry rub.
Dry rubs are mixtures of herbs and spices that you rub into your raw meat. They might include herbs like thyme and rosemary and spices such as cumin, chili powder, and garlic. Dry rubs meld into the surface of your ribs as the rack slowly smokes and helps develop the flavor of your meat bark.
It’s best to coordinate your rub with any sauces you plan on using at the finish. For instance, if you’re using a sweet barbecue sauce you might prefer a dry rub without any sugar. There is an endless number of possibilities when you use a dry rub.
One thing to be careful of when you’re seasoning your rack of ribs is to use some salt- but not too much! Salt will draw moisture from the surface of your ribs and help develop the tasty bark, but it’s easy to go overboard. Go easy on the salt until you know the amount that best suits your personal tastes.
Smoked Ribs with the 3-2-1 Method
Your results will also vary depending on your smoker set-up, the type of fuel and wood you use, and how you wrap and cook your ribs.
While the 3-2-1 method makes it really easy to produce a nice rack of pork ribs, the devil’s always in the details. Everyone has their own idea of what the perfect rack of ribs should be, and small differences in technique can have a big impact on your results.
Tips For Getting the Best Results
You may need to adjust the method if you prefer chewier ribs or a thicker bark, for instance. Here are the tips and tweaks you need to know to get the most out of the 3-2-1 method when smoking pork ribs.
Equipment
You don’t need a ton of specialized equipment to make a good rack of ribs with this technique. Any smoker or outdoor cooker that can fit a rack of ribs and maintain an even, low temperature will do. You can even use your grill to indirectly smoke a rack if you want!
Sometimes it’s actually easier to use a cheap, leaky offset smoker over a premium ceramic smoker or Big Green Egg for the 3-2-1 method.
These well-insulated designs create a couple of challenges when it comes to rib smoking. They don’t allow for much airflow around your meat. If you use a kamado-style smoker or Big Green Egg, your ribs may not develop much bark on the exterior of the rack.
Also, it’s hard to maintain low temperatures in a ceramic smoker, and they tend to be better suited for higher-heat cooking than low-and-slow BBQ.
Let’s Talk Temperatures
When it comes to meat smoking, I’m usually really focused on monitoring the temperatures of my smoker and meat during the cooking process.
The best smoking temperature for pork ribs is right about 225°F. This low-and-slow approach gives your rack time to develop a tasty bark and converts the tough cartilage into gelatin. You’ll definitely want to track and monitor the temperature inside your smoker using a thermometer to keep things in this range.
There are several problems with using a thermometer to track your rib’s progress as they cook, however.
It’s hard to poke a rack of ribs without hitting a bone, which skews your temperature reading. Also, the meat in different parts of your rack may reach the ideal temp at different rates. Unless you’re poking or monitoring in multiple places on your rack you might pull it too soon or worse, allow it to overcook.
Usually, I monitor and pull my smoked pork a few degrees under the ideal final temperature of 203°F. With ribs, I don’t bother much with temperature probes and go off how the rack looks and feels. You can read more about how to tell when your ribs are ready below.
Woodsmoke is Key at the Start
One of the advantages of smoking pork ribs over other methods of cooking like braising is they develop a rich, smokey flavor and tasty crust of meat bark along the outer surface. You might think you need to use a lot of woodsmoke to achieve the perfect rack of ribs- and you’d be wrong.
I won’t bore you with a science of meat smoking lecture, but the truth is your meat’s smoke flavor is mostly developed in the first hour or so on the smoker. Once the surface of your rack has dried out, it’s acquired as much smoky flavor as it’s going to.
It’s important, then, to be sure you maintain an even level of smoke for the first couple of hours. By the time you’re ready to wrap your ribs for the second stage of cooking, you don’t need to worry about the smoke any longer.
How to Wrap Your Ribs
An important step in the 3-2-1 method is the second step, where you wrap your meat in foil, butcher paper or parchment. This is a version of the Texas Crutch, and it helps speed your ribs through the cooking stage where your meat tends to stall.
While most consider foil to be the best wrapper, I would argue that parchment is actually a better choice if you love a rib with thick, meaty bark. Foil will seal tightly and stop all the evaporation from the surface of your rack. Parchment paper allows for some air flow but still seals in moisture, leading to a thicker bark and juicy meat.
Regardless of the type of wrapper you choose, you’ll need a couple of sheets that are at least twice as long as your rack of ribs. They should also be wide enough to fold over the rib tips and overlap in the center of the rack.
To wrap your ribs:
- Place a wrapper sheet on your cutting board.
- Carefully center your hot rack on the sheet, meat side down. Bring the edges together over the rib tips towards the center of the rack, and then fold the sides in, crimping or folding everything together. Be careful not to tear the wrapper as you do this.
- Now layout the second sheet and flip your wrapped rack over to the center of the new one. The meat-side should be facing up, and the sealed side of the wrapper should be against the new sheet.
- Fold the second sheet just as you did the first, ensuring the tightest seal possible.
- Your rack of ribs is now ready to go back on the heat for another 2 hours!
Finishing in the Oven vs Smoker
You don’t have to return your ribs to your smoker once they are wrapped. At this point, you have a couple of options.
You can, of course, continue cooking your ribs low-and-slow outside. But there’s no particular reason you have to and the flavor won’t really benefit from going back on the smoker.
Alternatively, you can finish your wrapped ribs in a 225°F oven instead. This has the benefit of creating a set-and-forget stage since you won’t have to do much to maintain your oven’s temperature.
If you’re busy, or if your smoker is a challenge to keep at 225°F, then finishing in the oven might be a real bonus!
| Some more great BBQ tips |
|---|
| Applying Dry Rub |
| Types of Ribs |
| Texas Crutch |
Step by Step Method for 3-2-1 Ribs
- Preheat your smoker to 225°F. While the smoker heats, prep your rack of ribs by removing the rib membrane and rubbing it all over with a flavorful dry rub.
- Place your rack in the smoker with the meatier side facing up and the rib bones facing down. Smoke for approximately 3 hours, maintaining an even 225°F inside your smoker.
- After 3 hours of smoking, remove the rack and wrap it tightly in your wrapper of choice. If your ribs seem dry, you can add a bit of broth, beer or juice to the wrapper for extra moisture. Return to the smoker, or cook in a slow 225°F oven for about 2 hours.
- After 2 more hours of cooking, pull your rack and unwrap it. Take a good look at your meat and test its tenderness. The meat should still be firmly attached to the bones but starting to loosen. When you bend your rack in half, the meat should flex easily but the surface should not crack.
- Place your unwrapped rack back on the 225°F smoker or in a pan in your oven for approximately 30 minutes to 1 hour.
- Keep a close eye on your rack of ribs during the last hour of cooking. You’ll want to start glazing it with your BBQ sauce (optional) during the last 20 minutes of cooking for the best flavor. Your ribs may finish-up in less than an hour, so start testing your rack after 15 minutes.
- Your ribs are ready when they pass the rib bone and bend tests. They’ll also have an internal temperature of 198°F.
- Pull the rack from the smoker, rest for 5-10 minutes, and you may slice the ribs and serve!
How to Tell the Ribs are Done?
How do you prefer your ribs?
Some folks swear by ribs that are fall-off-the-bone tender, while others like myself prefer a bit of chew to their meat. Since there are so many different opinions on the ideal pork rib texture, it’s a bit challenging to estimate when a rack is perfectly done.
But luckily there are a few ways to tell when your ribs are ready. I usually use a combination of tests to determine the ideal time to pull my ribs from the smoker.
The Rib Bone Test
One method is to test the rib bones and see how much give there is between meat and bone. A raw rib won’t have any give, whereas an overcooked one will twist right out of the meat with little pressure.
Cover your hand with a pair of heat-resistant grill gloves, or use a pair of tongs. Grip one of the center rib bones and give it a twist. Try pulling a bit on the bone, and wiggling it from side to side.
For chewier ribs that are tender but not mushy, you’ll want there to be some give between the meat and the bone. When you twist or wiggle the bone, the meat should loosen around the edges but stay attached.
For well-done ribs, the meat should twist from the bone easily but with a bit of pressure. You should be able to wiggle the bone without a lot of effort, but it shouldn’t fall out at a gentle touch.
Bend the Rack
Personally, this is my favorite method to test when ribs are ready. Once your ribs are deeply colored and are tender enough to pass the rib bone test, try bending the rack in half.
Grab a pair of tongs in each hand and fold your rack in half, bone side in. If your rib’s bark cracks as you bend, and the rack is easy to fold, it’s done!
Your rack should not fall apart when you bend it, however. If you can pull it apart by bending you’ve already passed the ideal level of doneness.
Measure the Temperature
While leave-in thermometers are not ideal for tracking ribs as they cook, that doesn’t mean that you should never measure their temperature.
I don’t bother much with monitoring ribs progress during the first and second stages of cooking, but the last hour is different. This is the make-it or break-it time. To avoid overcooking your ribs, it helps to know their internal temperature.
I’ll usually measure the temperature with an instant-read thermometer when the ribs are about 15 minutes into that last hour. When my ribs start to look done, I take a reading in a few spots. Once my ribs hit 190°F I start glazing with a sauce if I’m using one, and then I’m ready to pull once it passes the bone and bend tests.
Your ribs will be ideally cooked once they reach 203°F, but if you leave them on the grill until then they might overcook as they rest. To avoid this problem, pull your ribs right around 198°F, and once they’ve rested they should be perfect.
So, Should I use the 3-2-1 Method Every Time?
The 3-2-1 method is fairly foolproof and provides an easy way to consistently make good pork ribs. But the method is not one you’ll catch many professional pitmasters using.
For truly great ribs, you really have to match the length of each stage of cooking to your specific rack of ribs. It takes a lot of rib-smoking experience to know exactly how long your ribs should be smoked, wrapped for the Texas Crutch and finished. Some experts don’t even use the crutch and just smoke their ribs through the stall.
My biggest problem with this method is that it can often lead to overcooked or mushy ribs. Spending two hours in the crutch can soften your meat bark and leave the meat with a stewed texture. Since I prefer ribs with a nice bit of chew, I rarely stick to the 3-2-1 precisely.
This method is a great place for novice pitmasters to start, however. Using this method, you can play with the exact timing until you’ve hit upon your ideal combination.
It might end up looking more like a 3-1-0.5 by the time you’re done, but it’s a great way to master the art of BBQ ribs. I definitely recommend playing with the method and keeping notes on your results when you experiment with it.
Variations of the 3-2-1 Method
While the 3-2-1 method is the most well-known technique for making ribs, that’s not your only option. You can vary the length of the different stages to accommodate any types of ribs. As I said above, there’s no reason you shouldn’t play around with the timing of the various stages until you hit on your ideal combo.
One option is called the 2-2-1 method. Just as with the 3-2-1, in this case, you’ll smoke your ribs for 2 hours, wrap in the crutch for 2 hours and finish for an hour back on the smoker.
This version has the benefit of a shorter overall cooking time and lower fuel consumption. Your ribs will be tender and smokey but shouldn’t turn out mushy. If your ribs are too tender with the 3-2-1 method, give the 2-2-1 a try instead.
The 4-1-1 method is ideal for beef ribs and chewy but tender pork ribs. As with the other versions, you’ll smoke the ribs for 4 hours, crutch for 1 hour and finish unwrapped in the smoker for the final hour.
The longer smoking time helps develop a deeper bark and rich color on your meat. You’ll still speed through the meat stall when you wrap the rack in foil, but your meat won’t overcook. The final blast of heat will finish the bark’s development and help your BBQ sauce turn into a delicious glaze of flavor.
Conclusion
The 3-2-1 rib method is an easy and fairly foolproof way to make tasty spare or baby back pork ribs. This method is ideal for novices because it eliminates the guesswork and close monitoring of your meat’s temperatures. As long as you maintain your smoker at 225°F you should have good results.
While professional BBQ chefs rarely use the 3-2-1 method exactly, they often use variations of it to produce their first-class racks of ribs. Just like the pros, you can tweak the method any way you choose to produce your ideal rib experience.