My picks: choose the Weber Grill ’n Go 7661 for a compatible Weber handle, Yukon Glory for USB-C charging, or TempPro A100 for affordable adjustable brightness. Check the mount and the beam’s path past the open lid before buying. If you already own a comfortable headlamp, try that first.
| Grill light | Best use, power and the catch |
|---|---|
| Weber 7661 | Compatible Weber handles. Lid-activated, detachable light; 3 AAA batteries. Check the exact grill model, not just the Weber badge. Midrange. |
| Yukon Glory | Regular cooks who prefer charging. USB-C; automatic lid switching. Round handles up to 1.38 inches (3.5 cm), with room for the bracket and beam. Midrange. |
| TempPro A100 | Adjustable brightness on a budget. Screw clamp; 3 AAA batteries; three brightness levels. Confirm the jaw opening for your handle. Budget. |
| Broil King 60934 | Simple Broil King handle fitting. Flexible strap; 3 AAA batteries, not included. Handle compatibility does not remove the heat warning. Budget. |
| TYTUS TYT-ACC-GRL | A wide light head and two mounting options. Clamp or magnet; 4 AA batteries included. Its manual requires more than 20 inches (50.8 cm) from the fire. Higher-priced. |
Sources: linked manufacturer pages and manuals, Weber’s published accessory catalog, and US Broil King dealer pricing; checked November 2026. US price bands: budget under $30; midrange $30–$44.99; higher-priced $45 and up, before tax/shipping. Bands can change; pack contents vary by market.
Which grill light should you choose for your setup?
- Weber or Broil King owner: start with the Weber 7661 fit list or Broil King 60934 strap. Confirm your handle is supported before comparing extras.
- Another brand with a round handle: shortlist Yukon Glory for charging and automatic switching if the diameter is no more than 1.38 inches (3.5 cm). Choose TempPro A100 for lower cost and brightness control, once its clamp fit is confirmed.
- Oversized or non-round handle: rule out Yukon. Ask TempPro to confirm the A100 fits your measurements, or consider TYTUS if its mount and greater-than-20-inch fire clearance work on your grill.
- Kettle, kamado or no suitable mounting point: try an existing headlamp first. You can light the food without fitting a bracket to the grill.
Before buying: check the handle shape and size, then the beam’s route past the open hood. A secure bracket can still leave the food in shadow. The side-view diagram below shows why.
What are the best grill lights for different setups?
These five options solve different mounting and power problems. Choose the one that fits your grill and routine; paying more cannot fix a bracket that is the wrong shape or a beam blocked by the hood.
1. Weber Grill ’n Go 7661: Best for compatible Weber grills
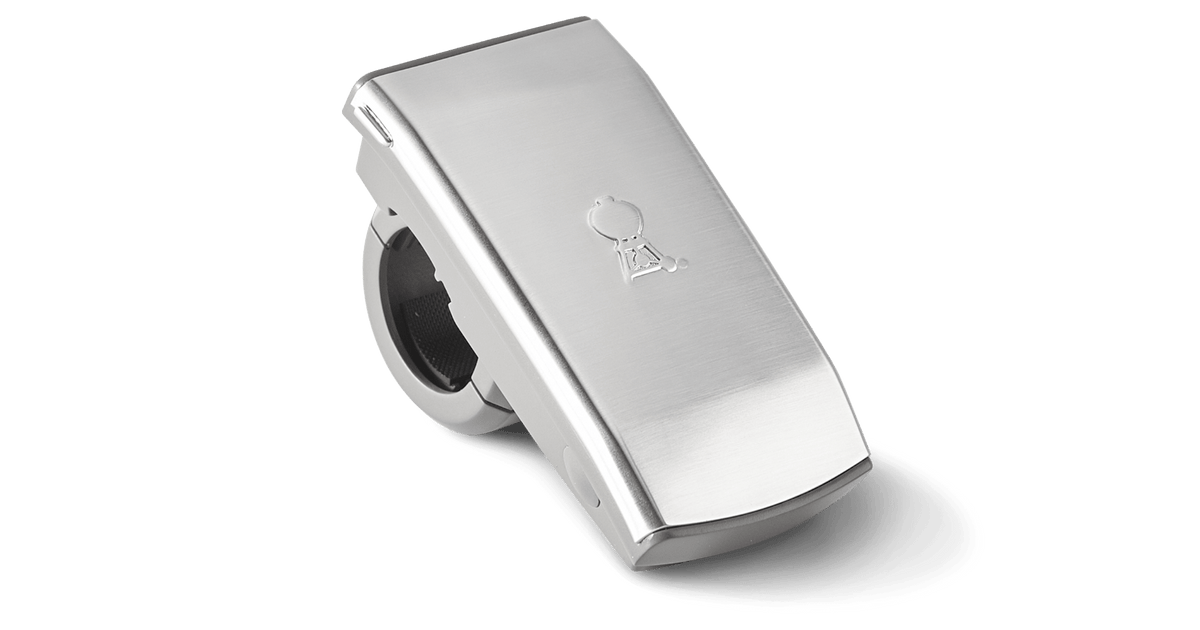
I would start here for a Weber listed in the compatibility guide. The 7661 attaches to the handle, switches on as the lid lifts and switches off when it closes. The light also detaches for use away from the cooking surface.
Weber’s current fit list includes round handles on Spirit grills, all Spirit II and Genesis II models, Searwood 600/XL 600, Weber Smoque/XL, and selected Genesis and Summit grills. Its Summit listing specifies 2007–2023; check your exact model before ordering.
Key specs: handle-mounted · automatic lid switching · detachable lamp · 3 AAA batteries.
Pros
- Automatic switching while opening and closing the lid
- Detachable for lighting a nearby task
- Manufacturer publishes a specific fit list
Cons
- Compatibility is limited to specified handles
- No USB charging
- One mounting position limits alternative aiming locations
Skip it if: your model is absent from Weber’s fit list. A Weber kettle, Q or Traveler needs its own compatibility check; the shared brand name does not make this bracket fit.
Weber or Yukon? On a supported Weber, I would choose the 7661 for its detachable lamp and replaceable batteries. Choose Yukon if USB-C charging matters more, but measure the handle and check hood clearance separately; Weber compatibility does not transfer to the Yukon bracket.
2. Yukon Glory Rechargeable Handle Light: Best rechargeable option
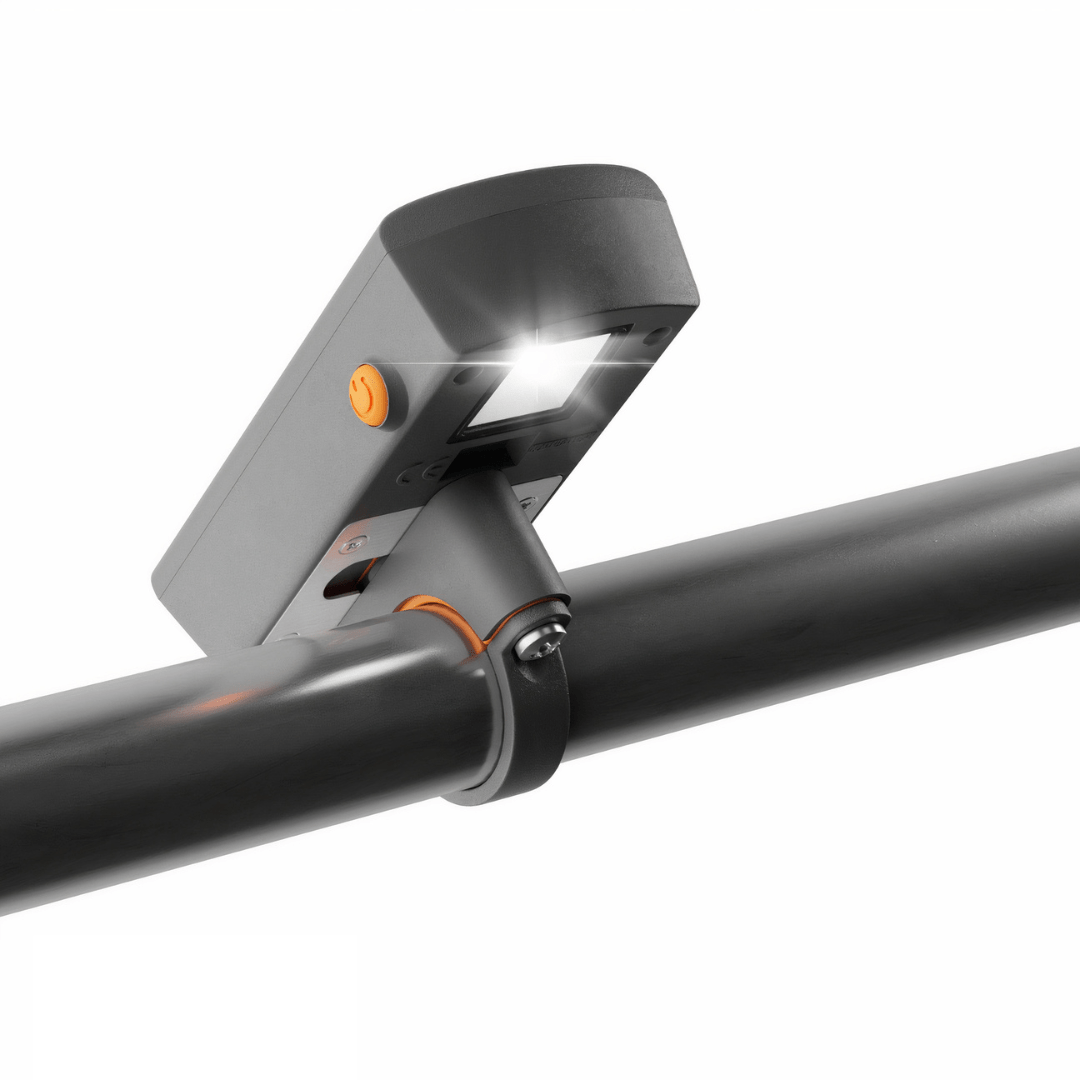
The Yukon Glory suits regular evening cooks who prefer plugging in a light to keeping spare disposable batteries. It uses USB-C charging and a gravity-controlled switch that responds to the lid opening and closing.
The manufacturer specifies round handles up to 1.38 inches (3.5 cm). Measure across the handle, not around it, and check its cross-section. A flattened or pear-shaped handle is not equivalent to a round bar of the same maximum width.
Key specs: rechargeable battery · USB-C cord and wall charger included · automatic switching · adjustable lamp.
Pros
- USB-C charging avoids routine battery replacement
- Automatic switching with lid movement
- Published maximum round-handle diameter
Cons
- Round-handle restriction rules out some grills
- No clear runtime figure on the current maker page
- Needs protection during heavy rain
Skip it if: your handle is oversized, non-round or positioned where the open lid would obstruct the beam. Check reach past the lid edge as carefully as bracket diameter.
Yukon versus TempPro: if both fit, I would pay more for Yukon when automatic lid switching and USB-C charging are the priorities. TempPro makes more sense when lower cost, selectable brightness and an immediate battery swap matter more. Yukon’s unpublished runtime is a reason to charge it before a long cook.
3. TempPro A100: Best budget option with adjustable brightness
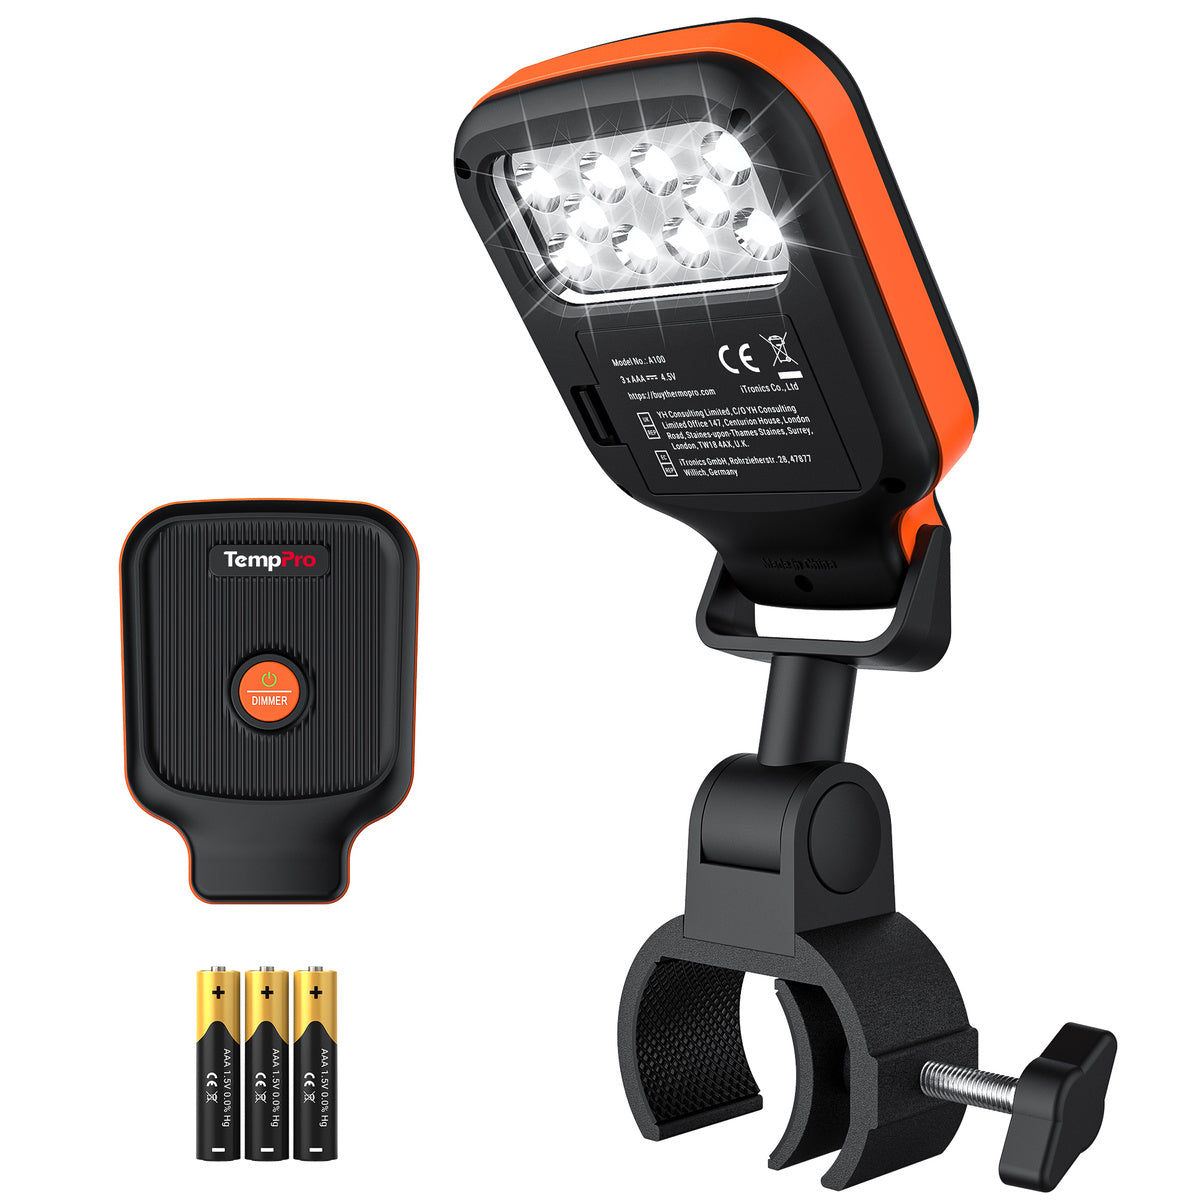
I would choose the A100 when a small clamp light is enough and brightness control matters more than automatic switching. Three settings let you reduce glare when other lighting is already available, rather than run a single bright setting throughout dinner.
TempPro lists 100 lumens, three AAA batteries and IPX4 splash resistance. The head rotates horizontally and tilts. The manual’s working-temperature ceiling is 131°F (55°C), so this belongs away from the fire and hot grill surfaces.
Key specs: adjustable screw clamp · three brightness levels · 3 AAA batteries · IPX4.
Pros
- Three brightness settings
- Adjustable head for directing the beam
- Replaceable batteries and a budget price band
Cons
- No magnetic mounting option
- No numeric clamp-opening limit in the current text specification
- Operating temperature rules out hot mounting locations
Skip it if: you cannot confirm the clamp fits, or the only attachment point would expose it to excessive heat. “Adjustable” should never be read as “unlimited.”
Before ordering, send TempPro your handle’s width, depth and shape and ask whether the clamp will close with room for your hand. For a round handle, give its diameter. The missing jaw measurement should be resolved before the lower price decides the purchase.
4. Broil King 60934 Flex-Strap Light: Best simple strap mount for Broil King
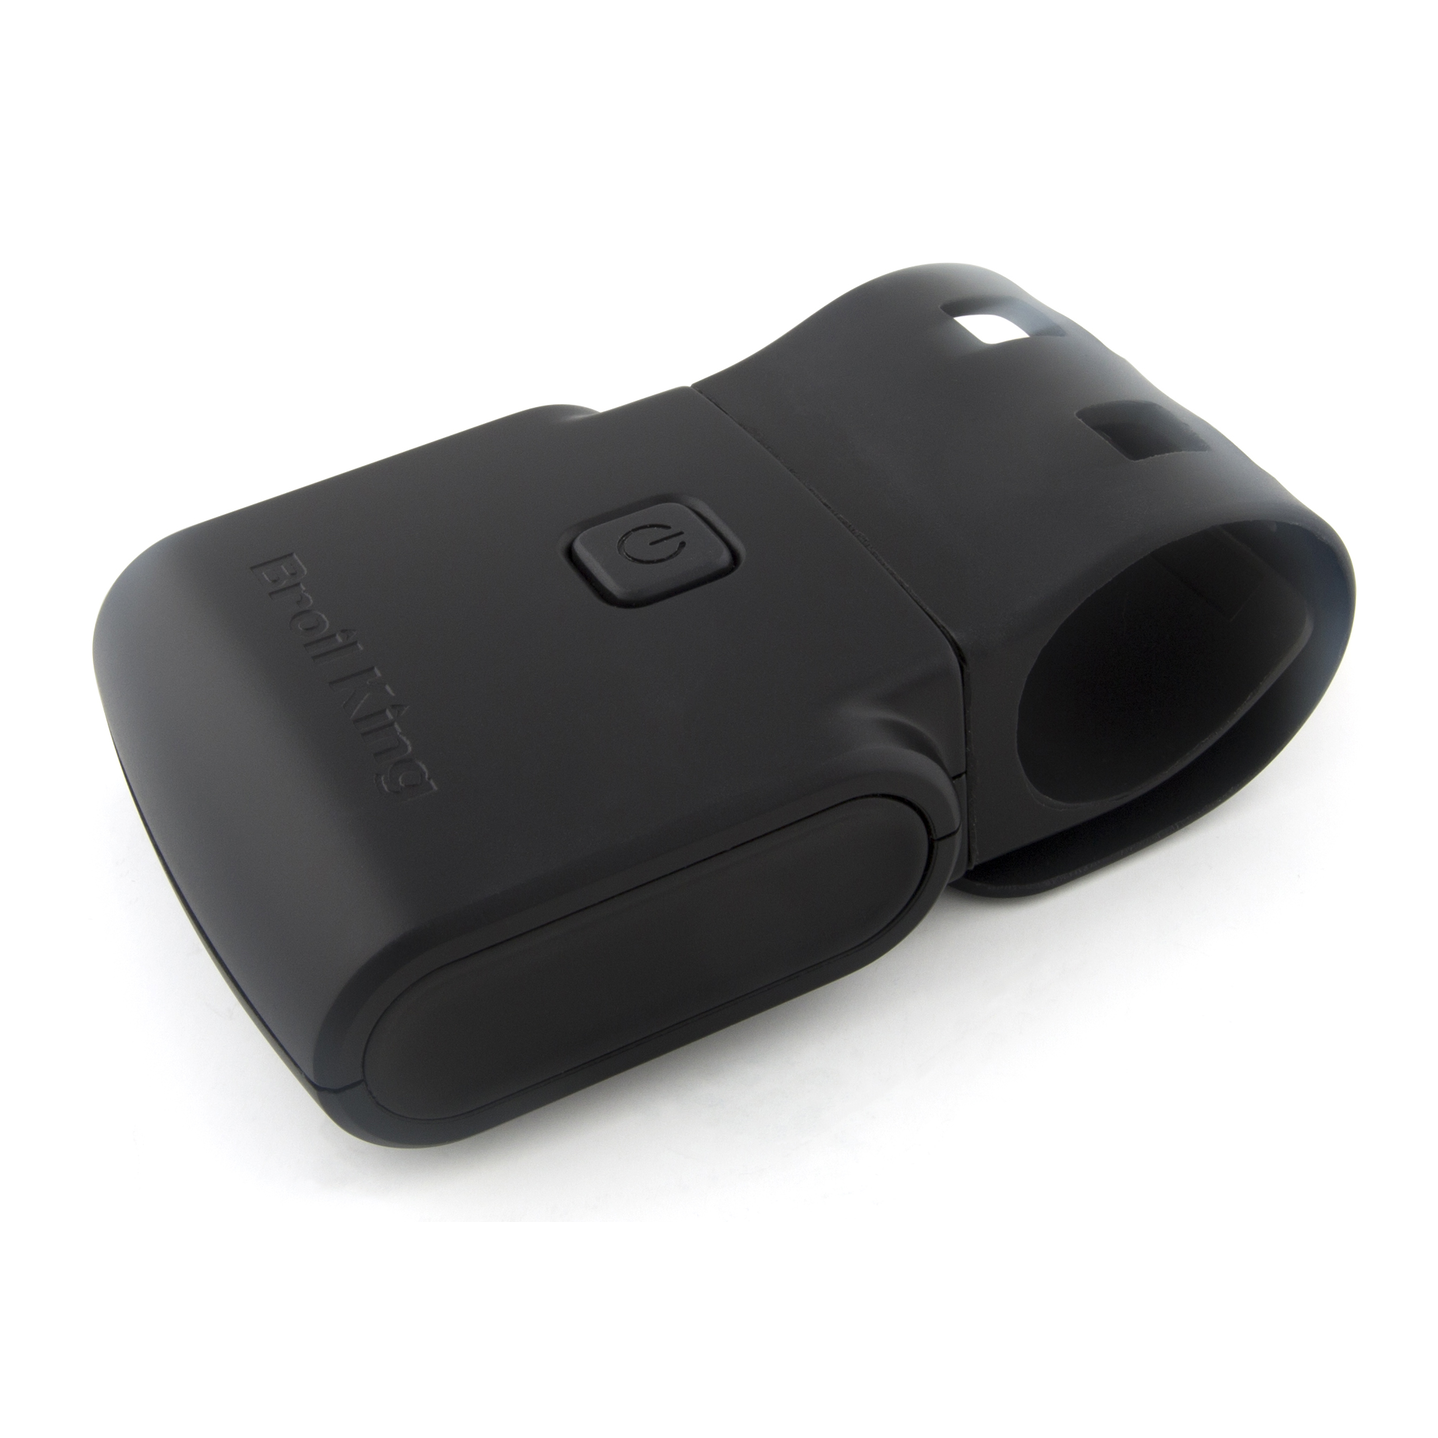
For a Broil King owner who wants a straightforward handle attachment, the 60934 avoids a rigid clamp collar. Its flexible strap wraps around the handle, and the light can be positioned for left- or right-handed operation.
Broil King describes compatibility with its grill handles, a COB light strip and a weather-resistant body. The instructions show three AAA batteries; they are not included. The manufacturer’s store link is Canadian, so US buyers should check a local dealer’s stock and currency.
Key specs: model 60934 · flexible handle strap · COB lighting · 3 AAA batteries.
Pros
- Flexible strap attachment
- Easy positioning and removal
- Budget option for supported Broil King handles
Cons
- Batteries are an additional purchase
- No published numeric fit range for other brands
- Prolonged high heat with the lid open can damage it
Skip it if: you need a light for extended, high-heat cooking with the lid open. Broil King specifically warns about that exposure in its 60934 instructions.
Buy by the model number: the 60936 uses a different mounting arrangement. A similar-looking listing is not a substitute for checking the attachment supplied.
5. TYTUS 10-Inch LED Grill Light: Best wide head with clamp or magnet mounting
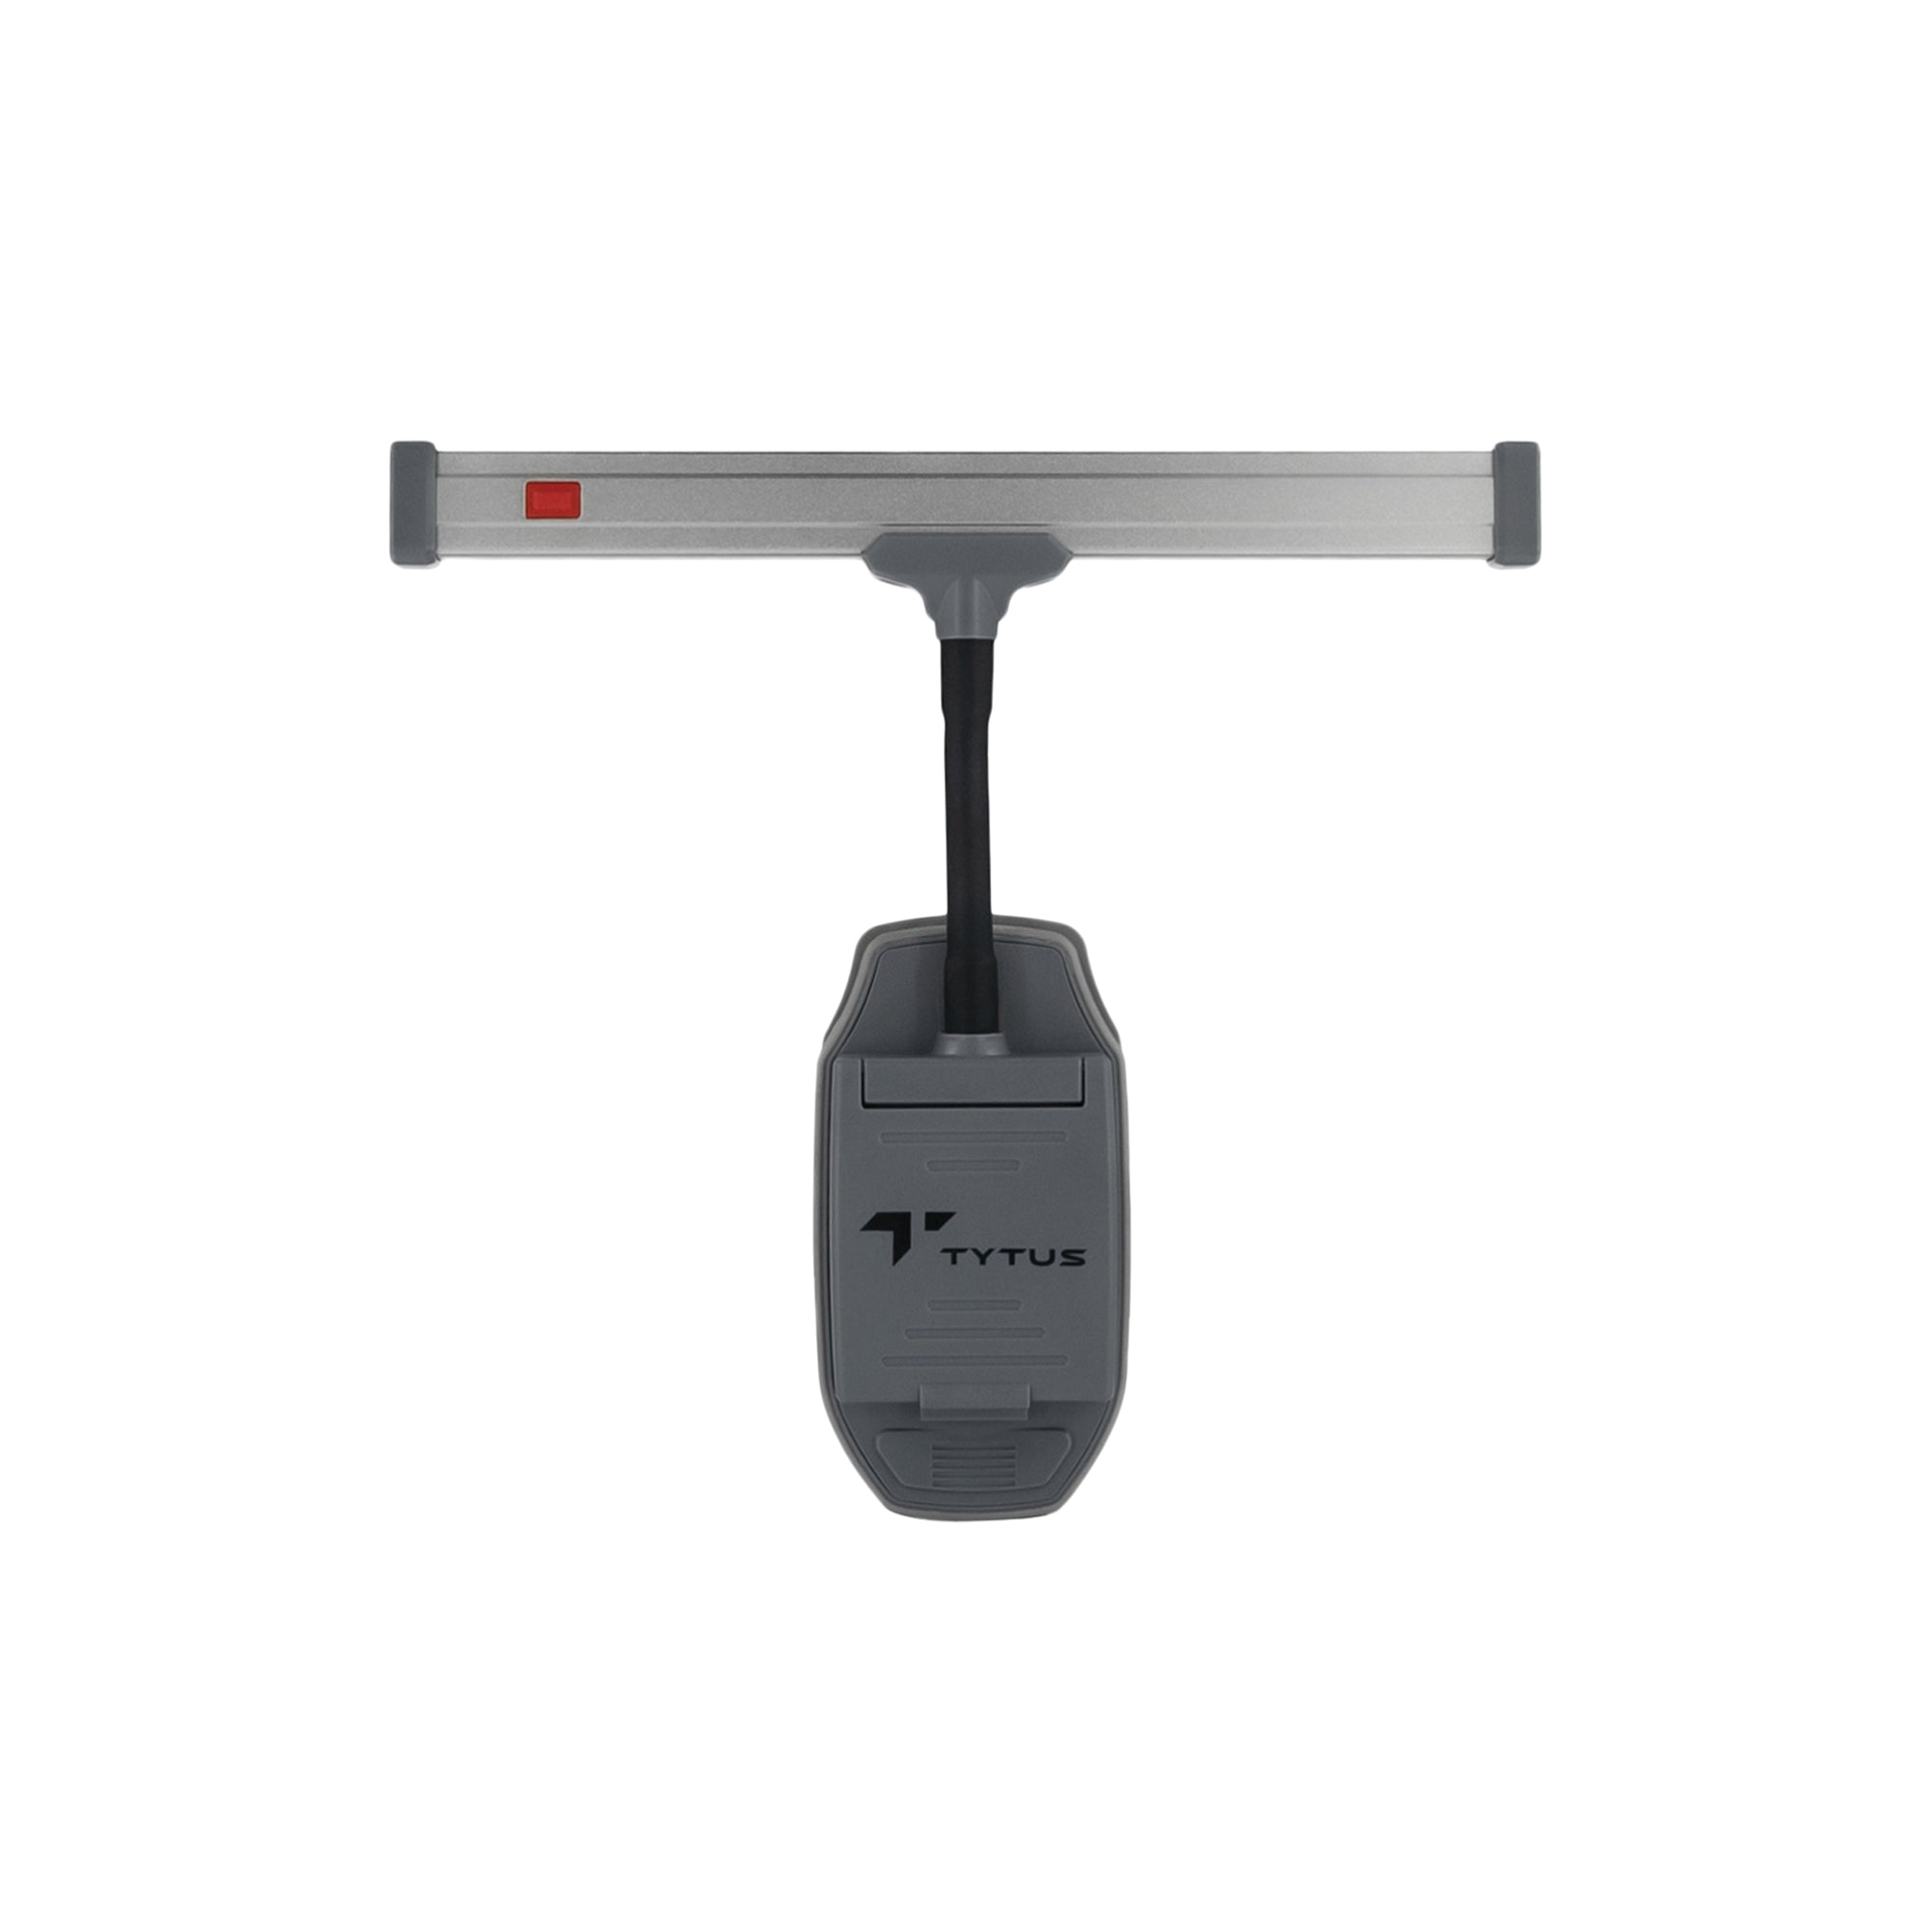
The TYTUS offers a different layout from the compact handle lights: a wide bar on a flexible neck, with both clamp and magnetic attachment. I would consider it for a broad cooking area where the mounting location also meets the manual’s clearance requirement.
TYTUS specifies a 10-inch head and 350-lumen output. It includes four AA batteries; these are not AAA cells. Its manual describes high and low settings.
Key specs: TYT-ACC-GRL · clamp or magnetic base · flexible neck · 4 AA batteries included.
Pros
- Wide light head
- Two attachment methods
- High and low settings with batteries included
Cons
- Requires more than 20 inches from the fire
- Higher price band than the compact budget picks
- No verified IP rating or numeric clamp limit in the sources checked
Skip it if: you cannot maintain the manual’s greater-than-20-inch clearance from the fire. Do not choose it on the assumption that any magnetic spot on the grill is suitable.
A wider head gives another way to arrange the light, but it does not guarantee edge-to-edge coverage on every grill. Check the corners and center before committing to a mounting position.
Why can a light fit the handle but miss the food?
The mount and the beam solve different problems. A high-mounted handle or deep hood can put the lamp behind an obstruction when the lid is open. The light then hits the hood instead of reaching the cooking surface; more LEDs will not remove that obstruction.

With the grill cold, check the beam’s route and adjust only within the light’s permitted range, then recheck lid movement. If the hood still blocks the beam, use another approved mounting arrangement or a headlamp. Do not move the light closer to the fire to compensate.
What should you check before buying a grill light?
| Factor | Why it matters and what to check |
|---|---|
| Handle shape | Diameter alone misses flattened or tapered handles. Match the actual shape and leave room for your gloved hand. |
| Magnetic surface | Aluminum, wood and ceramic do not provide a magnetic mount; stainless steel varies. Check the exact location, its flatness and the installed light’s stability. |
| Lid and beam clearance | The lamp must clear the moving lid and shine past its edge. Check the full movement with the grill cold. |
| Cooking-area coverage | The center can be bright while the corners stay dark. Check all five points, including both direct and indirect cooking zones. |
| Heat and weather limits | Water resistance does not establish heat tolerance. Read the exact model’s placement instructions and storage guidance. |
| Power and removal | Choose a battery or charging routine you will maintain. Check access to the compartment, charging socket and release mechanism. |
Source: GoShindig’s buying checklist, informed by the linked manufacturer instructions and owner feedback; November 2026. These are checks to perform, not measured compatibility results.
Where should you mount a grill light?
Follow the light’s instructions before choosing the brightest-looking position. A grill light’s body, batteries and mount sit outside the cooking chamber. A magnet sticking to a hot lid or firebox does not establish that it belongs there.
Position and adjust it while everything is cold. Keep it clear of vents, flames, moving hinges and the path of your hands. If a recommended location would obstruct the lid or exceed the light’s heat limits, use another lighting arrangement.
- Attach it with the grill cold and unlit. Follow the model’s instructions and check that the mount stays secure without crowding your hand.
- Open and close the lid fully. Check for contact with the body, hinges or warming rack. Confirm that the light also clears the grill cover.
- Switch it on in dim conditions. Check the center and all four corners, then move your tongs through the working area to spot shadows from your arm.
For two-zone grilling, include both the searing and indirect sides in that check. If one side stays dark, first correct the aim or obstruction; a second light is useful only when each mounting position meets its instructions.
Three different limits: TYTUS requires more than 20 inches (50.8 cm) from the fire. TempPro lists a 131°F (55°C) maximum working temperature. Broil King warns that grease fires or prolonged high heat with an open lid can damage its light. None of these statements certifies another model’s mounting position.
Finish the setup before lighting the grill. Keep your usual BBQ gloves and long-handled grilling tools accessible; a lamp should not occupy the handle space or working room you need to cook.
How bright should a grill light be?
Buy for usable coverage, not the largest LED count. A concentrated beam can make one burger look brilliantly lit while leaving the back row in shadow. Distance, beam shape, aiming and obstructions all affect what reaches the food.
There is no useful universal lumen cutoff for every grill. Start with a beam that covers your working area without shining into your eyes. If the center is bright but the sides are dark, try changing the angle or adding light from another direction before simply choosing a higher output.
Seeing browning is not a doneness test. FDA explains that meat color does not establish safe cooking. Use the light to see what you are doing and an instant-read thermometer to check the food’s internal temperature.
Can you leave a grill light outside?
I would favor a light that is easy to remove after the grill cools. “Weather resistant” is not permission to leave every model exposed through the year. Follow its care instructions, keep the lens clean and check battery contacts when replacing cells.
The A100’s IPX4 rating describes splash resistance, not immersion protection or a heat rating. Yukon Glory advises protection during heavy rain. A grill cover also does not make a light’s battery compartment waterproof.
For storage, switch it off and follow the manufacturer’s battery-removal guidance. Do not hose down the lamp with the grill. A damp wipe, where permitted by its instructions, is a more controlled way to remove cooking residue.
Are rechargeable grill lights better than replaceable-battery lights?
Choose the routine you are more likely to maintain. Rechargeable lights suit frequent use and avoid repeated disposable-battery purchases. Replaceable cells are convenient when you want to restore light immediately by installing a fresh set.
Compare runtime at the brightness setting you will use. TempPro advertises over eight hours on low and over three on high; those are maker figures, not a measured comparison with the other picks. LED lifespan claims describe the light source, not how long one set of batteries lasts.
Weber’s 2026 US catalog lists three AAA batteries included and 20 hours for the 7661. It does not give comparable brightness conditions, so I would not rank its endurance against TempPro from those numbers alone.
A spare set of the correct batteries is useful for a long cook. Check the compartment before buying: a light that needs awkward disassembly may be less convenient than its battery type suggests. Follow the instructions on battery chemistry and avoid mixing old and new cells.
Would a headlamp work better than a grill light?
If you already have a comfortable headlamp, try it before buying another accessory. It follows your view from the grill to the prep table and serving tray. It also avoids finding a suitable clamp or magnetic surface on a kettle, kamado or compact portable grill.
A mounted light makes more sense when several people share the cooking, you dislike wearing a lamp, or you want the grate lit while looking elsewhere. With a headlamp, aim it down and avoid shining it into another cook’s eyes.
Task lighting and patio lighting solve different problems. Solar garden lights may help define the surrounding space, but check that you can also see the grill controls, prep surface and route back indoors. Decorative lighting alone may leave the open lid casting a shadow over dinner.
How did I choose these grill lights?
I compared current manufacturer pages, compatibility information and available manuals, prioritizing attachment, beam positioning, power and removal. Each pick has a distinct purpose. I excluded legacy recommendations whose current model details I could not verify, rather than treating an old retailer listing as enough evidence.
I also read competing comparisons and owner feedback, including Yukon Glory’s handle-fit comments and a Kamado Joe discussion about shelf materials and headlamps. Those comments helped identify checks a buyer should make; they are not failure rates or proof that every grill behaves alike.
I checked indexed CPSC recall results for grill lights and the shortlisted brands; no matching light recall surfaced in that search. That is a limited search, not a safety certification. Product facts and price bands were checked in November 2026, and the linked maker instructions should take priority if specifications change.
