There are hundreds, if not thousands of different commercially available BBQ grills and yet year on year kettle grills far outsell any other type of grill. The style is iconic and synonymous with quality BBQ food and this game-changing invention to the outdoor cooking world was inspired by just one man – George Stephen, the founder of Weber-Stephen Products Co. His early kettle grill, which soon became the “kettle original” is basically an early iteration of what I’m reviewing today, the Weber Master Touch, but now there are a lot more bells and whistles. I could prattle on about the rich history of Weber and kettle grills for hours but most of you are here for a Weber Master Touch review, so no more looking at the past, let’s look to the future.
Contents
Weber Master Touch Review
BUY THE WEBER MASTER TOUCH FROM AMAZON
Price
Affordability is key to any product you buy, and depending if you’re Bill Gates, on minimum wage or anywhere in-between, what’s affordable varies massively. So I’m not going to tell you what you can or can’t afford, I’ll let you be the judge of that. What I can tell you is if the Weber Master Touch is of good value when compared to other comparable kettles.
Weber offers a few other styles of Kettle grill to the Master Touch, there is the portable Smokey Joe, the table mounted Performers and the supersized Ranch Kettle. Is the Weber Master Touch better value/price compared to their other Kettel grills? The Smokey Joe is a portable grill, and therefore much smaller than the Master Touch and cheaper but unless you intend to only use your grill at picnics you’ll likely find this grill will be too small for your needs. The reverse is the case with the Ranch Kettle. Again, a great grill however this one is bigger and more expensive – if you plan on holding big cooks this might be for you. However, before you decide on a bigger or smaller Kettle be aware that most 3rd party and Weber accessories are made for the 22 inch / 57cm grill, which is the size of the Master Touch. This fact on its own means I’d side with the Master Touch being better value.
Comparing the Master Touch and the Performer is really hard. They are essentially the Kettle, both measure in at 22 inches and have the same accessories available for them. The main difference is the Performer comes mounted on a table instead of the classic three legged stand of the Master Touch and it has a gas ignition system for an easy startup. These features are great but it does mean that the Performer is considerably more expensive than the Master Touch – more than double in fact. Now, I’d never try to talk you out of buying a Performer, or any Weber Kettle, as it is a great piece of kit but if I was to make a call on the best value for money I’d say it’s the Weber Master Touch.
Of course it’s not just Weber that makes Kettle grills. Since George Stephen launched the very first Kettle back in 1952 there have been countless copycats. Some are even very good, like the Kettles from Napoleon. But the one thing you expect from a copycat is that it will be cheaper, and this just isn’t always the case (Napoleon Kettles for example are normally more expensive). On top of that, you don’t have the peace of mind knowing that these grills will stand the test of time like you do with Weber grills. I know people that use the same grill for near on 20 years (Weber Kettles normally have a 10-year warranty, that’s how confident they are in their product). And if you have been around BBQ people, whether on forums or social media groups, you’ll know Weber’s customer service is top notch. With other brands you’ll be playing Russian roulette as you just don’t know how they deal with after sales care.
If a cheap copy is all that you can afford then so be it, it could be a false economy and you have to buy another grill the following year, or it could be a lucky find. Either way, you’ll at least know whether Kettle grills are for you and maybe you’ll have more money by the time it comes to replacing it.
A tip if money is tight – For many grilling products I wish to buy, I normally wait till near the end of the BBQ season. This is when many of the large chains attempt to get rid of unsold stock. Yes, it means you’ll not get much use out of it in the current year, but you’ll have it for many years to come. And Kettle grills aren’t like iPhones, where people need the latest one, and they change every year. A good Kettle grill that is properly looked after will likely outlive you.
What’s good about the Weber Master Touch
As this is a Weber Master Touch review I’m sure you like to have a detailed list of all the pros and cons of buying this grill. So the next two sections will cover all I believe is good and bad about the Master Touch.
Build Quality – As already mentioned, Weber Kettle grills normally come with a 10-year warranty this alone should tell you the build quality is of a very high standard.
The main body and lid are both pressed from a single sheet of solid steel, meaning no welds to rust and no weak point for cracks to form. These sheets are coated with a durable powder coated porcelain enamel and it’s this coating that gives you the confidence the grill will last for many years.
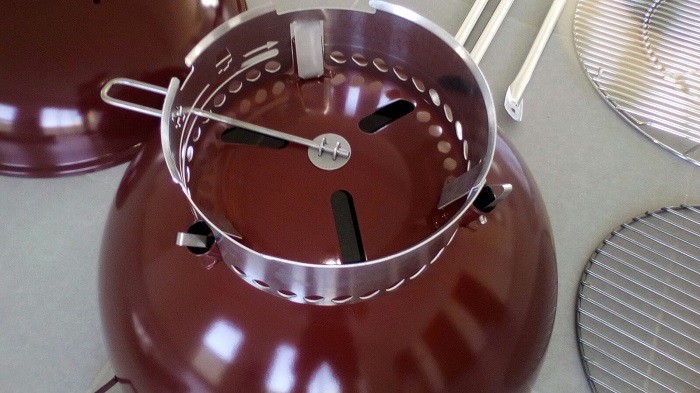
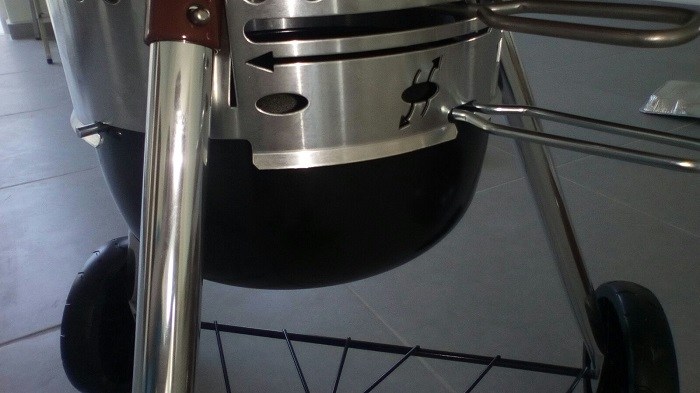
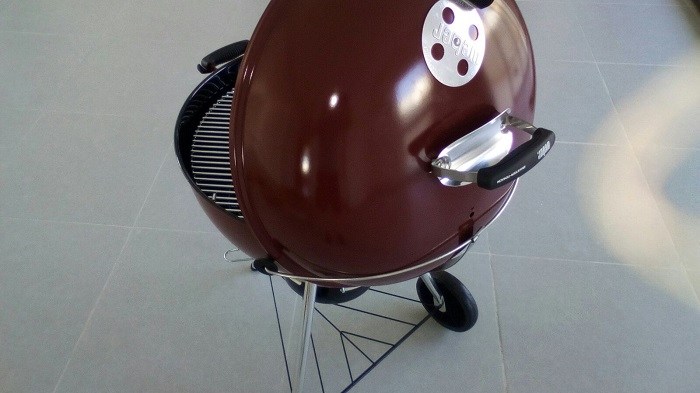
Vents – The Master Touch comes with two vents, one at the bottom of the body and one in the lid. These vents have been specially designed to allow just enough air to keep your coals red hot but also to minimize the risk of flare ups (when fat trips onto the coals and flames shoot up), as there isn’t enough oxygen to feed the flame.
Ashtray – The lower intake vent for the Master Touch has a basket attached to the bottom of it which is used as an ash catcher system. I really like the idea of being able you clean up easier once the coals have died out. And although I have added having an ash collection system as something good about the Weber Master Touch, it isn’t perfect. The three pronged vent closer is also meant to work as an ash sweeper, and although it does sweep some ash into the ashtray it leaves so much that you still need to get a brush to sweep away the rest – meaning you might as well use the brush from the start.
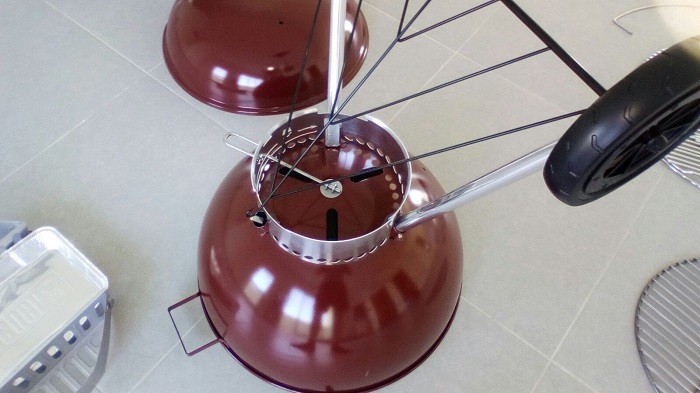
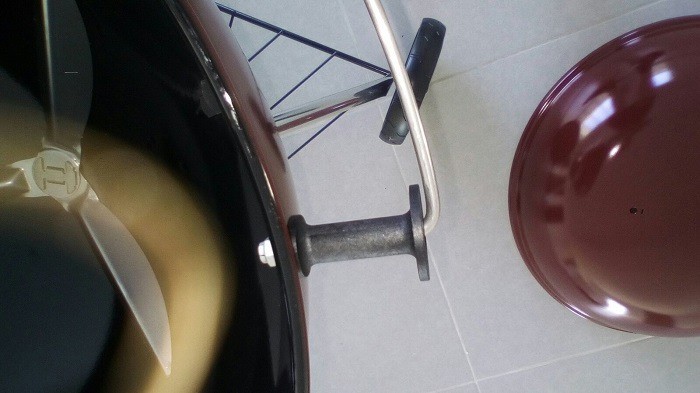
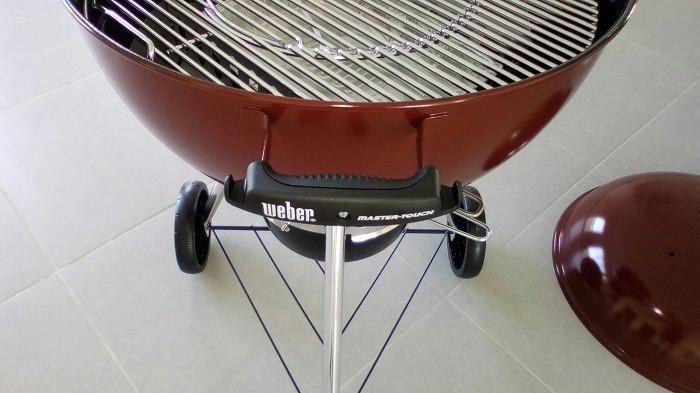
Wheels – Although the Weber Master Touch isn’t designed as a portable grill it’s still nice to have wheels. A lot of people like to move their grill into the garage, BBQ shack or other storage space after each use or at the end of the summer season. The Master Touch has two wheels and a handle on the body of the grill that makes it extremely easy to move (the handle is also great for hanging utensils like tongs on).
Lid Holder – Sometimes it’s the simple things that are the best ideas and they make you wonder why they weren’t always a thing. The lid holder is one such idea. A simple metal rod that runs half way around the body of the Master Touch makes storage of the lid when checking on the food super easy. No more turning chicken with one hand while holding the lid with the other, meaning you can always have your beer handy.
There is one slight issue with a lid holder of this type. When it’s windy you’ll have to be extra careful. When placing the lid into the holder it turns into a big sail on the body of your grill. So any big gust of wind and your whole grill could topple over. Make should if you are cooking on a windy day that you either place your grill in an area protected from the wind or refrain from using the lid holder.
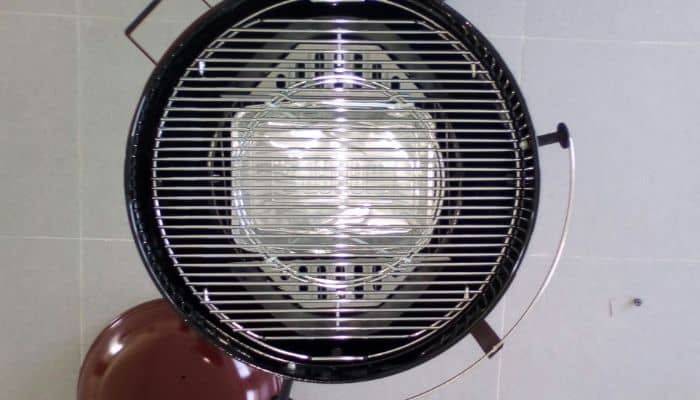
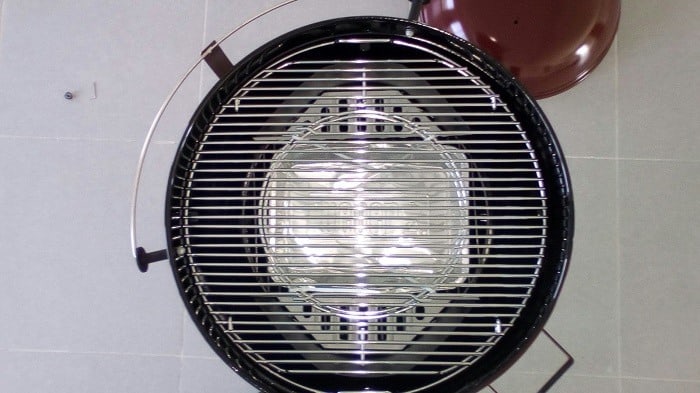
The Cooking Grate – This grills full name is the Weber Master Touch GBS, and although no one really says the GBS it is one of the good features of this kettle grill. GBS stands for Gourmet BBQ System and this system is all to do with the cooking grate. It has two liftable flaps on each side to aid with replenishing the coals and a removable center circle that is interchangeable with other Weber cook surfaces, such as a pizza stone, dutch oven, wok or griddle.
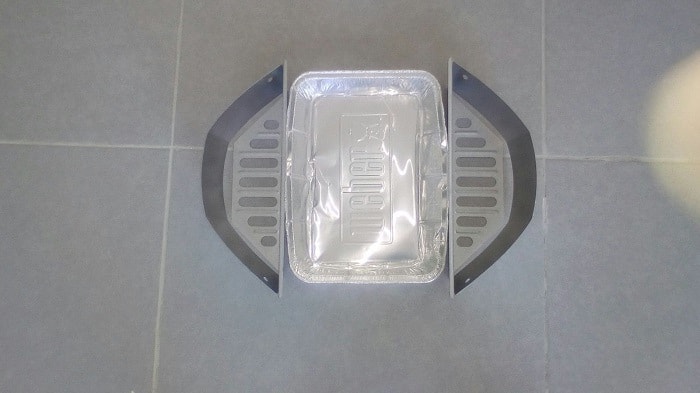
Charcoal Holders – You still have a charcoal grill underneath the cooking grill but the Master Touch also comes with two charcoal holders to give you easy zonal cooking (cooking where you have different heat zones). Generally these are placed at opposite sides of the body of the Kettle underneath the flaps of the Gourmet BBQ System – which I mentioned above is for easy coal replenishing. But many people also place both these holders in the center of the grill, giving a larger direct heat source and having the outer ring as a warming area.
What’s bad about the Weber Master Touch
Maybe the heading is a bit harsh, as nothing is really bad with this grill but there is definitely one obvious area for improvement.
The Temp Gauge – Firstly, digital displays have been around for longer than I can remember now, so Webers standard bi-metal dial thermometer is severely dated. Many people had hoped that when Weber bought iGrill back in 2016 that this would result in iGrill technology being installed in Weber grills instead of dial thermometer. This is yet to happen, but you often find iGrill’s packaged along side Weber grills at a discounted rate.
Secondly, the temperature gauge is in the lid of the grill. No one cooks up that high, you need a temperature reading at the cooking grill level. This is why many people say the temp gauge doesn’t work. It does work, it gives the correct reading for where it is located, it’s just located in the wrong place. You also get a different reading to your original read if you take the lid off to check on your food and don’t put it back in the same place, as the dial might now be closer to the charcoal holders.
Weber Master Touch Accessories
Most, but not all, BBQ grills come out the box with everything you need to start cooking. And this is the case with the Weber Master Touch. The beauty of the most popular grills is that they have a host of different attachments and accessories available to help with different cooking styles. So what are the best and most popular options?
There are two types of accessories. You have the general grilling accessory, such as a fire lighter like a chimney starter, meat thermometers like the thermapen or expander racks which are good for all charcoal grills that you own or might own. These are far too numerous to cover in this post, so I’ll be keeping to the other type of accessory, ones made especially for 22 inch Weber Kettles (or copycats). I will say though, the one item from the first type you should definitely consider buying is a temp probe that sits at grill level.
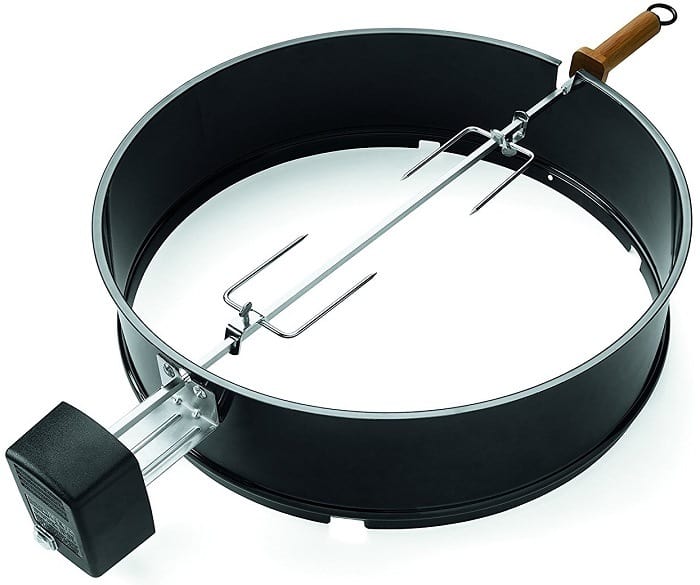
Rotisserie – when you think of a rotisserie, chicken is the first meat that comes to mind but there are many great meals you can make on a rotisserie. Whole books have been written on the subject and some sites are dedicated to rotisserie cooking. Done right, meat can taste so much better and this is why I’d recommend the Weber Rotisserie attachment.
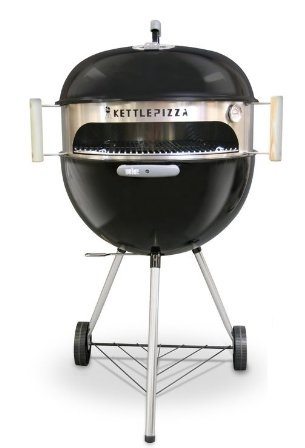
Pizza attachment – This one is a little controversial, people either love it or hate it. Normally the people that hate it are people that don’t see the need to buy a separate attachment. Saying all you need to do to make pizza on a Kettle is buy a pizza stone. And they are right, but this attachment looks really cool and makes it that little bit easier. Giving you the nice opening to slide the pizza in and out. I’d say if money is tight just get a pizza stone, if not buy this pizza attachment. I love it and it is definitely a talking point when you have guests over.
Fire Butler – The main reason I’d recommend the Fire Butler is that it converts your Weber Master Touch into a smoker. Of course you can already smoke with the standard features you are provided with when you buy it. However, the difference you experience with the Fire Butler is massive. Firstly the Fire Butler allows you to use your whole grilling space by providing you with a heat deflector (which doubles as a hibachi). You also get a new firebox with it that aids with a nice slow consistent heat. This fire box also allows you to add enough coal so that you’ll easily be able to get a ten-hour smoke out of it, which you’d struggle to get without it. Watch the video below, where the designer of the Fire Butler explains the benefits much better than I can.
Slow n Sear – Another great attachment to help turn your grill into a smoker is the Slow n Sear. Given the choice, I’d say you should buy the Fire Butler, but that one is slightly more expensive. Unlike the Fire Butler, the Slow n Sear doesn’t have a big heat deflector that opens up the whole grill to be used.Instead, it sits at the side of the grill a bit like the charcoal holders the Master Touch comes with – except this is of a much higher quality. In the Weber world on forums and Facebook, people that switch to the Slow n Sear over the charcoal holders are instant converts and you’ll not likely hear a bad word about it.
Vortex – This is one of them classic love or hate products. You’ll hear the haters calling it “poortex” while the lovers will be showing you pictures of their beautiful crispy chicken wings. I think the reasoning behind the criticism the Vortex gets is mainly to do with the price. Its price is in the region of many other Weber Master Touch attachments, but what most people see is just a simple dome shaped single piece of steel. I have to say for material costs and labor it does seem very expensive, it’s why many people try to make their own by cutting off the bottom of dog bowls. But my very limited business skills tells me supply and demand sets a price, and the people that make the Vortex must believe they have this right. If the price wasn’t a factor this is a very good piece of kit. I’m sure there wouldn’t be any haters if the price seemed a little more reasonable (which is happening due to numerous copycats). I’ve got no complaints and I’d buy it again. Due to many fakes being sold, be safe and go to the official Vortex BBQ site to find out where to buy.
Popular Weber Master Touch Hacks
Hacks are great ideas to make your life easier. Why the manufacturer hasn’t implemented these sort of things as standard is either likely to do with cost, the mods are too niche, or because it took the hive mind of thousands of people using the product to see there could be improvements. But whatever the reason people like to make hacks with their Weber Master Touch and below I’ll list most popular.
WARNING – Modifications or hacks to your Weber Master Touch is likely going to void your warranty. Don’t attempt any of these changes unless you accept this risk.
Add a hinge to the lid – As you already know, the Master Touch comes as standard with a lid holder. But for a surprising number of people this isn’t good enough (the lid may be too heavy or fiddly to keep putting in the holder), and a hinged lid is their answer. There are many hinges available to buy, but one company comes highly recommended for Weber hinges, as they are specially made for the kettle grill. So if this is a hack you want to try head over to Unknown BBQ.
Grill Gasket – This is something you’re more accustomed to finding in more expensive Kamado style smokers. They are used to give a better seal around the lid to keep it air tight, which for a smoker is a good thing as it helps temp control and conserves fuel for longer cooks. I’m not sure this is needed for a kettle grill, but if you plan to use it primarily as a smoker then you might want to consider adding a gasket. BBQGaskets.com is a good starting point.
Temp gauge hole – The vast majority of people that buy a digital probe instead of using the one supplied by Weber (something I recommend) are happy to just place the lid on their wires. But as these probes aren’t cheap some people worry this could damage the wires. One method to avoid this is to feed the wires through the top vent – this can be a pain when taking the lid off. Another method is to drill a small hole at the top of the base of the grill to feed the wire.
Myth Busting
Maybe I’m an idiot, but this is a myth I believed for many years, so many people say it you think it must be true – especially when first starting out grilling. “The shape of a Kettle grill makes it a more efficient heat reflector than other shaped grills”. I’m not sure why the Kettle grill became the shape that it is, maybe it’s easier to make, or maybe it’s simply because the original designer used an old buoy from his work place to make the grill, or could just be that it looks cool. Whatever the reason, it’s not because it’s a better heat reflector. The vast majority of heat comes from the coals and a little bit comes from reflecting off the sides, but no more than you’d get with any other shaped grill.
| Some more great grills |
|---|
| Best Charcoal Grills |
| Grill Brands |
| Combo Grill |
Weber Master Touch Assembly
The assembly of the Weber Master Touch is pretty easy. Below I’ll show several pictures of me putting together a new Kettle grill straight out the box. Please note the box doesn’t come with all the tools you need to put the grill together. You’ll also need an adjustable spanner and a Phillips (crosshead) screwdriver.
Assembly took around 20 minutes, including taking pictures, so is relatively quick. The only part that was difficult is adding the legs to the main body. The instructions advise that you add the leg clips to the body early in the assembly, however, I’d advise you to add the clips to the legs later in the installation – when it’s time to add the legs.
Weber Master Touch Box
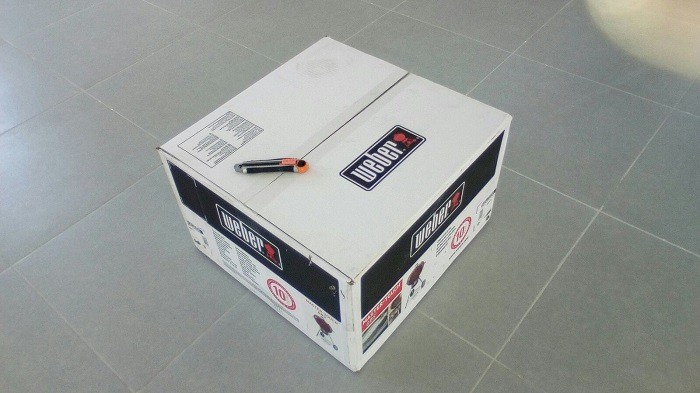
What you should see when you open the box
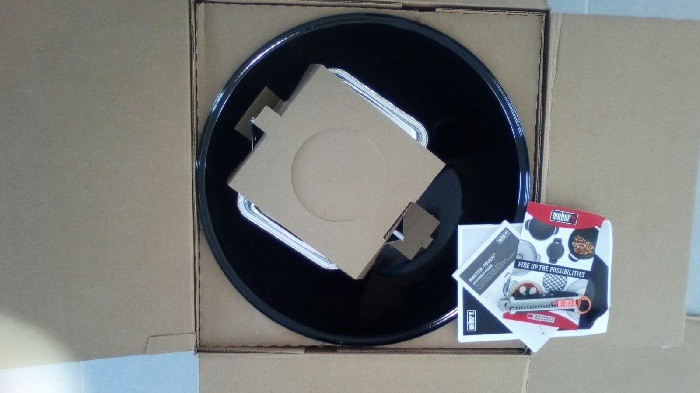
Unpacked Main box
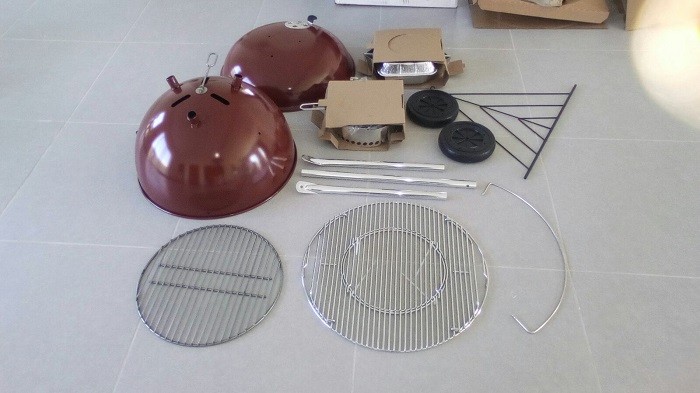
First small box inside the main box unpacked

Second small box inside the main box unpacked
Once unboxed the instructions say you should add the leg clips as below. But I’d recommend adding them to the actual legs later
Add a section on the air vent system. You’ll likely need to use a bit of force here.
Now attach the legs. This is pretty tricky and some people might find doing this with another person a good idea. I’d also advise you take the leg clips out the body of the grill and add them to the legs.
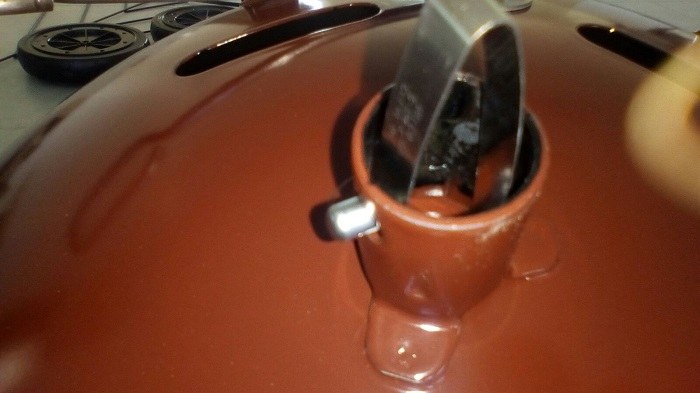
Now you add the lid holder, you’ll need a spanner for this, but don’t over tighten the nut.
Add the ash catcher bowl
Add the charcoal grill, charcoal holders and the cooking grill
Attach the Weber Master Touch branded handle, you’ll need a screwdriver for this
Now add the lid and you are done 🙂
Where did you purchase the crimson mastertouch?