Welcome to GoShindig, today I’ll be reviewing the Thermoworks Signals thermometer.
Thermoworks believes a great thermometer can make your life better, and with this in mind, they have gone about making some of the best thermometers for a plethora of needs. Whether you need a thermometer for BBQing, grilling, baking, frying, or sous viding Thermoworks will have a quality thermometer for you. And without knowing it I am sure you have seen their thermometer at work as nearly all the TV cooking competition shows give their contestants Thermoworks gear to use.
The Signals is currently the top Thermoworks BBQ & grilling dual probe thermometer, and has a price to match this prestige, so let’s run through the setup, key features, accuracy, pros & cons, and the competition to the thermometer. But first, let’s see what’s in the box.
Contents
What’s In The Box
When you open the box you are presented with a large thermometer, hopefully, if you purchased it correctly, in your favorite color. The Signals come in nine different colors. The main unit comes with a protective cover for the screen so it’s not scratched during transport. On the front of the unit you have six buttons, I’ll go into more detail on the buttons a bit later. On the side, you have four probe ports and a USB-C charging port. And around the back, you have a power button that doubles as a backlight button, a couple of magnetic strips as a holder, and some rubber no-slip feet if you decide to lye the thermometer on its back. You have similar feet on the base also.
This main unit comes with four probes, three meat probes, and a shorter stubbier probe to measure air temps. Or an ambient probe as it is more commonly known. The ambient probe had a grill grate clip for easier use, and all four probes have little rubber rings of different colors to better organize your grilling.
For power options, you have been given a nice length of USB-C charging cable. And what is now unusual with modern thermometers, you have also been given a mains plug which you can plug your USB cable into. I like that they have added this, as I hate having to rotate my devices due to a lack of plugs.
Setup
Setting up the Thermoworks Signals so it had both Bluetooth and WiFi was relatively pain-free, but it wasn’t without issues. As I always do, I followed the instructions that come with the thermometer. I’m sure I could wing it with modern thermometers, but I like to read the instructions to see if there is anything interesting that could make the articles I write.
So I turned the thermometer on and then went to the app store to download the Thermoworks BBQ app. The app downloaded pretty quickly. I then pressed open. I have to say I was a little disappointed by the app right off the bat, as I was asked to sign in, I don’t really see a need for this. There were three options for this sign-in, so I tried to pick the option that would give the app as little info about me as possible. I clicked the “Sign In Anonymously” button.
Unfortunately, this presented me with a warning message, saying using the anonymous sign-in would mean I’d lose all data when logged out, which I assume means my WiFi setup information. Already a bad user experience for me. But also other people can not add the device to their account until I remove it from mine. My wife would also want to use this thermometer with her cooks so I decided anonymous was a no go for me.
Feeling forced, I decide to sign in with google. Once signed in I was hit with another request or more of a demand, this time for my location data. Unlike having to sign in, being asked for your location info isn’t unusual for thermometer apps, I have no idea why they want this info but they all ask for it. Again, not really having much choice I give access to my location.
Finally into the app, I am greeted with a button to add a device. On pressing this button you are now asked to select the type of device you want to add from a list of options. Obviously, we wish to add the Signals thermometer, so select that option.
If your Bluetooth isn’t turned on you are prompted to do this. Once Bluetooth is turned on, if it wasn’t already, the app now looks for your Signals device. It was taking a long time to find, and at this point, I realized my thermometer had turned off. Seems it shipped with only 1 or 2 percent battery charge. So would have been nice if the first job in the instructions manual was to charge the thermometer. Or of course, send you a thermometer with a decent amount of charge like many other companies do.
So using the USB-C charging cable I plug the thermometer into my laptop to charge. As soon as there was enough power to turn the device back on I proceeded with the setup. The app now skips through several stages in the setup without you having to do anything until it arrives at the WiFi network setup stage. The app automatically found my network name and all I had to do was enter the network password. Which is normally found on a sticker under your router.
Hopefully, for you, this will be all, your device is set up and ready to go. Unfortunately for me, this wasn’t the case. On the main thermometer page, I was given a big red bar telling me I needed to do a firmware update. I’d like to think this isn’t standard and it was just bad luck for me. I wish this firmware update was as simple as pressing on the red bar and the app handling the rest, but it wasn’t.
On pressing the firmware update bar I was told to make sure I was plugged into AC power. Why? I don’t know. But I go and get the mains plug and charge the thermometer this way, maybe the power from the laptop was enough, but then I don’t know why I’d get that message. I then press the red bar again, but it now seems I have lost Bluetooth in changing the charger from my laptop to the mains power. Thankfully, it was easy to find the option to reconnect to Bluetooth in the settings section of the app.
Now I seem to be good to go, I press to update the firmware, and the update starts. Everything with the update is done on its own with no input needed from me. But once the update was finished the data I put in for the WiFi setup has been deleted. So I need to set up the WiFi option again. Like I said, relatively pain-free, but it wasn’t without issues.
Key Features
You’ll notice I mention the cost a lot during this review, that’s because other than the Meater Block thermometer I can’t think of a grilling thermometer more expensive than the Signals. So with the price in mind, I expect the Signals to come with a majority of the key features its competition has and at an equal or better quality.
Main Display
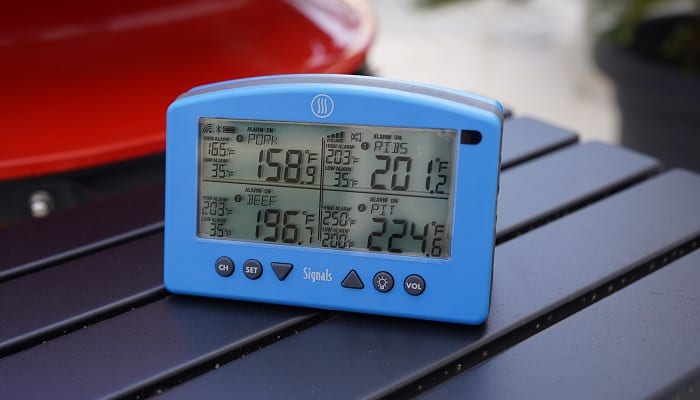
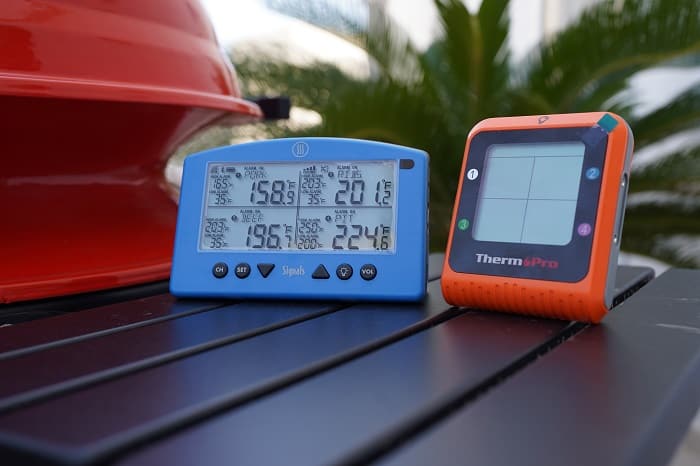
When you check the Thermoworks Signals against other thermometers one of the stand-out features is the large display screen. The main reason for this is the Signals is designed to be used by professional BBQ teams and professional chefs, and these professionals move around a lot and can’t guarantee internet access. So the large screen helps with the times you have to use the Signals as a stand-alone thermometer.
On the display screen, you can see the temps of all four probes simultaneously, their high and low alarms, the names of the probes, if you have wireless connections, the amount of battery remaining, and the volume of the alerts. I can’t think of any other thermometer I’ve used that gives you more information than this on the main display screen.
One final feature of the main display that just screams quality is the display is splashproof, coming is a water resistance rating of IP66. This means the device is water resistant against powerful jets but shouldn’t be completely submerged in water. So if you leave the Signals out in the rain it will be perfectly fine.
WiFI & Bluetooth
Of course, the Thermoworks Signals is wireless, you wouldn’t expect anything else. And they haven’t just given you one type of wireless tech they have given you two – WiFi and Bluetooth.
WiFi is the most advanced of these two options, allowing you to connect to the thermometer from anywhere in the world with internet access. You’ll not be needing this feature anywhere in the world, but you might need it if you pop down the shops during a cook or decide to hit the gym during a long low and slow pork butt.
Bluetooth is a backup option if you don’t have internet access. Maybe you want to take the thermometer camping or you are going to compete in BBQ competitions and internet access isn’t guaranteed. For whatever reason you might need a backup, Bluetooth is a good one to have, as all you need is your phone and the thermometer to get it working.
And remember, for all you none tech-savvy people out there, the Signals thermometer is also a stand-alone thermometer. The buttons on the main display give you most of the functionality the app gives you. So if you don’t have a smartphone or don’t want yet another app on your phone you don’t need to. This thermometer works perfectly well without a phone.
High/Low Alarms
The max volume of the alarms is 90 decibels. This volume is hard to convey in the video I made to accompany this review, as it all depends on the volume you have on your phone or laptop, but it is very loud. Louder than other thermometers I have used, and if I’m honest, louder than I’ll ever need to the point it was annoying. Thankfully the volume of the alarm is easy to turn down. But it’s good to know if I am throwing an extremely noisy BBQ party I have the option of turning up the volume.
App
The app for the Signals is very intuitive if you are used to using apps. When you first open the app you land on the dashboard page. This lets you select the device you want to have a look at. For most people, the dashboard will only have the Signals listed, but some people might have multiple Thermoworks devices.
After selecting the device, you land on a probes readings page. This page is a snapshot of all the information you need at a glance. This is basically the page that shows you what the main display screen on the transmitter shows you. You have the four probes temps and alarms triggers.
From the readings page, you can navigate to the main settings tab, where you can change global settings. You can change the name of your Signals device, something that’s only needed if you have multiple Signals in your setup. You can reset all four probes’ max and minimum alarm setting at the same time. Next, you have another option that might be helpful if you have a couple of different colored Signals, being able to change the color of the device in the app. If you only have one signals unit this option is mainly cosmetic.
It isn’t obvious what the interval rate option does at first glance. But it is a very useful option if you are running out of battery charge. You are able to select often you want the thermometer to update. From every 15 seconds to every 60 seconds. Choosing 60 seconds will mean your battery lasts longer, as the Signals device will be sending data to the cloud less often.
The last few settings are connection and firmware update options and the ability to remove a device from your account. I guess this last option is helpful if you decide to give your thermometer to a friend or sell it.
This is quite a good array of settings. But there are more. If you click into the individual probes you now have options for only that one probe. You have helpful options like being able to set the probe’s name. This is helpful if you have several different cuts of meat cooking at the same time. You can label one probe ribs, another beef, or pork. Making it easy to see which probe is reading temps from which cut of meat. You also have the option of changing the color display of each probe. You’d normally change this to match the color of the rubber rings you are given. This lets you easily see what meat the probe is in for each channel.
You can also turn on the high-low alarms from here, you can also set the range you want the alarm to trigger or reset the alarms for this one probe.
Another great feature on the Thermoworks Signals is the graph page. Here you can track the progress of your cooks. And see if you hit a stall and how long it took to cook through it. If you use this feature it’s good to change the color of each of your probes, as it makes the graph much easier to read.
Overall I’d say this app is excellent. Some other apps I’ve used have extra features like preset temps for certain cuts of meat but I think these features are great for BBQ beginners, the Thermoworks Signals is defiantly not targeting the beginner’s marketplace.
Holders
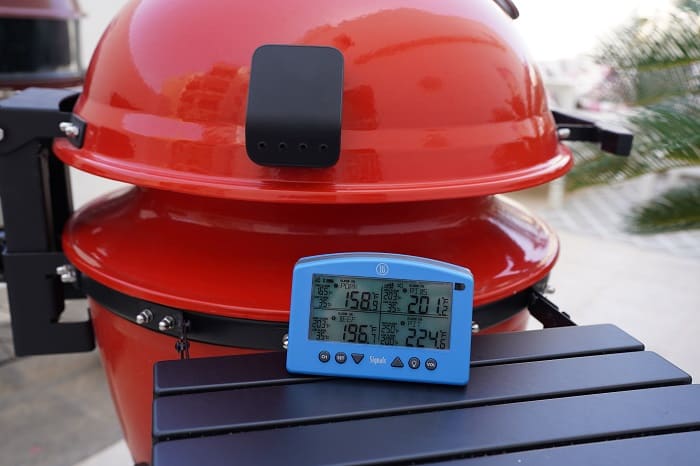
Magnetic holders are something you don’t realize you need until you have tried them. Then you find yourself trying to attach all small gadgets to metal objects.
The Thermoworks Signals is a big thermometer compared to the competition, so the magnets need to be stronger than average. They have placed two magnetic strips, running top to bottom of the unit, to help with this weight. But you have to make sure both magnets make good contact with what you are sticking it two otherwise you risk it falling.
If I try to stick the thermometer to the dome of a kettle grill for example it will fall off as both magnets don’t make good contact. I think they should have made the magnets big enough that one would hold the whole unit.
Backlighting
Having backlighting is a good addition to any thermometer, but it’s becoming less important as more people are using their phone apps to check on temps. However, it’s still a feature I expect. Especially on high-end thermometers.
The Signals has backlighting, and it’s plenty good enough for seeing the display data in the dark. There isn’t much else to say regarding this feature. Thermoworks has done a great job.
Extras
I’ve mentioned a few times in this article that the Thermoworks Signals thermometer is pricey. And now I’m going to say something that seems to defy logic. If you spend a little more money on buying the Thermoworks Billows as an extra for the Signals, the thermometer goes from being pricey to really good value for money.
I get that this doesn’t make sense at first, but hear me out. Buying the Billows converts the Signals from a dual probe thermometer into a temp controller thermometer. And temp controller thermometers are normally priced in the $200 to $300 range – and much more if you are looking at a Flame Boss thermometer or BBQ Guru’s latest controllers.
So buying the Billows means you now have a temp controller thermometer within the normal price range, but on top of that you have arguably the best dual probe thermometer for when you don’t need it running as a temp controller. In my head this makes sense, but let me know what you think in the comments.
One other extra that might interest you is the zippered storage case. This isn’t specifically designed for the Signals and can fit many other thermometers, but I think it’s always wise to have somewhere to store your thermometers.
How Accurate Is The Thermoworks Signals
The claim of having amazing accuracy is why the Thermoworks Signals can justify their high price tag. Yes, they also have great build quality, are Bluetooth and Wifi compatible, have an excellent app, and a trusted reputation. But competition BBQ’ers and TV shows first choice thermometer is a Thermoworks thermometer because of the accuracy.
And you know Thermoworks knows this because when you open the box for your thermometer you are greeted with an individual certificate of calibration for your unit. Meaning it has been tested and they don’t just test one or two models and make a claim for all other thermometers. Each Thermoworks Signals has been individually calibrated and you are given the results.
So it feels a bit silly doing my own home tests. But as it’s standard for thermometer reviews to have ice water and boiling water tests I’ll give it a go. For those that don’t know, ice water should have a reading of 32F and boiling water approximately 212F once altitude has been accounted for. And unsurprisingly, the Thermoworks Signals returns some great numbers. Giving 32.3F for the ice water test and 211.7F for the boiling water test.
If you want to do your own test I have linked to a chart that gives you the temp of boiling water at different altitudes, so you can check what your ideal temp should be.
Manufacturer Specs
| Probe Range | -58 to 572°F (-50 to 300°C) |
| Cable Max Temp | Max 700°F (370°C) |
| Accuracy | ±1.8°F (±1.0°C) from -4 to 248°F (-20 to 120°C) ±3.6°F (±2.0°C) from -58 to -4°F / 248 to 392°F (-50 to -20°C / 120 to 200°C) ±5.4°F (±3.0°C) from 392 to 572°F (200 to 300°C) |
| Max Sound Volume | 90dB |
| Wireless | Wi-Fi Radio – 802.11b/g/n (2.4 Ghz) Wi-Fi Range – dependent on router Bluetooth Version – 4.2 Bluetooth Range – About 95 feet line-of-sight (device dependent) |
| Approvals | US (FCC), Canada (IC), EU (CE – Complies with all relevant directives for Europe), AU/NZ (RCM) |
| Water Resistance | IP66 Splash-Proof |
| Operating Range | 32 to 122°F (0 to 50°C) |
| Backlight | 20 seconds |
| Resolution | 0.1°F (°C) |
| Units | °C/°F switchable |
| Sensor | Thermistor |
| Battery Life | Rechargeable, approx 16 hours |
| Charging Time | Approx 12 hours |
| Charger/AC Power | USB-C cable and 12V US adapter (included) |
| Display | 1.88 H x 3.97 W inches (48 H x 101 W mm) |
| Product Size | 3.26 H x 5.19 W x 1.92 D inches (83 H x 132 W x 49 D mm) |
Ease of Use
Once the Signals thermometer is set up with Wifi and Bluetooth to run the app on your phone, the rest is child’s play. All you need to do is turn on the thermometer, place the ambient probe onto the grill grate, and insert the meat probe into the center of the meat. It’s not rocket science and I’m sure anyone reading this article will have the skill set to use this thermometer.
Once you have the basics down you can then learn to control the setting with the app which I covered in the app section, or you can use the buttons on the device. This might look confusing at first but it really is simple. You have the “CH” button, which is short for channel, and pressing this button lets you select the probe you wish to change. Once you have selected the probe to change you then use the “SET” to go through the options of that probe. You can change the high/low alarms or turn the alarms off. You change the alarm temps using the arrow buttons.
The final two buttons are pretty obvious, you have one that has an icon of a bulb, which will turn on the backlighting for 20 seconds. And a “VOL” button that can be used to adjust the volume of the alarms.
Pros & Cons
I’m going to say the cost is a con, but of course, I understand that Thermoworks will say you have to pay for quality. And they are right, you do. However, I see this thermometer on sale very often, which tells me they are making more than a healthy profit when sold at full price.
As there isn’t much to complain about I’ll mention very trivial stuff. I’d have liked a QR code in the instructions to link me directly to the correct app to download. In fact, I’d say the instructions could have been better overall. I’ve set up loads of thermometers, so had no issue, but I could see it being a little daunting for anyone unsure of what to do.
Having to do a firmware update as soon as I set up the thermometer. Maybe I was just unlucky and there was an update between me buying the device and setting it up, as I’d like to think the device was shipped with the latest firmware. Thankfully I haven’t had to update it again, as it also looks like updating the firmware also removes your WiFi details and they need to be set up again.
Would have been nice if the unit shipped at least partially charged, as the instructions didn’t say I needed to charge it before moving on with the setup. It’s a minor detail, but other thermometers I’ve used have come charged, and even ones that have said to charge before doing the setup have had more charge than the Thermoworks.
I like to be able to store my thermometers away neatly, with no wires getting tangled with my other gear. And I understand a case being an add-on when buying a thermometer, but probe spools being an add-on is annoying. Other companies give you these as standard. So Thermoworks charging you extra for spools on top of what is already a premium price is grating.
The magnets could have been more powerful or better designed so that only one of the magnets need to make contact in order to hold the unit. I have nearly dropped this thermometer several times due to the weak magnets.
I’m not going to go into as much detail with the pros as this article has listed the pros. But the highlights are, the accuracy of the thermometer, the information-rich display screen, the quality app, build quality, having WiFi & Bluetooth, being splashproof, and the main selling point for me, it’s compatible with the Thermoworks Billows.
Competition
The dual probe thermometer marketplace is very competitive. So it should come as no surprise there are many companies with several different models with different functionality and price points all competing for the title of best dual probe thermometer and have you hand over your hard-earned money to them.
Before making any purchase in this price range you should always ask yourself if this is the best bit of kit for your personal circumstances, and what is the competition offering. Here I’ll go through what the competition has to offer, you can then answer if it better suits your needs.
Thermoworks Signals Vs Weber Connect
This is a matchup between the world’s biggest thermometer company and the world’s biggest BBQ company to find who does the best grill thermometer. For me, the Signals thermometer is the clear winner. The only reason I’d recommend the Weber Connect over the Signals is on the bases of price. But even then the price difference isn’t big enough.
Also, some people might choose the Weber thermometer just because they are fans of Weber. And don’t get me wrong on this, the Weber Connect is an excellent thermometer. Having both WiFi and Bluetooth, a nice app, and sleek looking unit. I just think the more information-rich display of the Signals and the stated accuracy of the probes that you know you can trust makes it the smart choice. But if the Weber thermometer was the one you liked I’d not talk you out of it.
Have a read of our Weber Connect thermometer review.
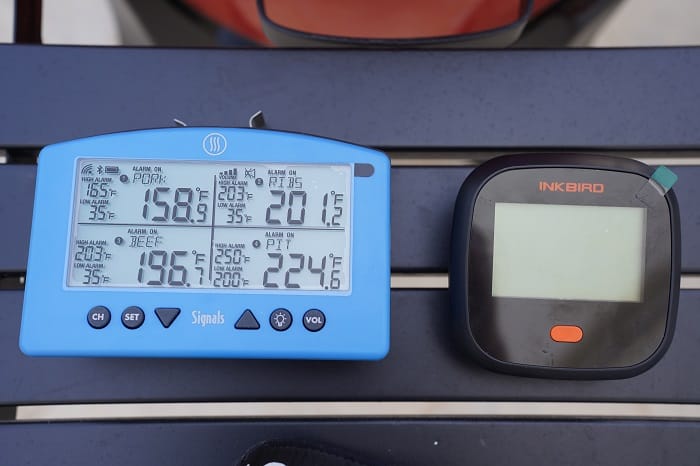
Thermoworks Signals Vs Inkbird IBBQ-4BW
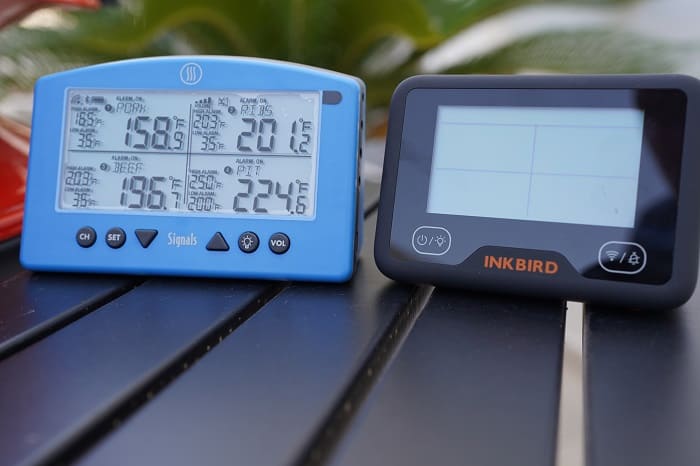
Like Thermoworks, Inkbird is a company renowned for making quality thermometers. And the Inkbird IBBQ-4BW is their premium offering. Just like the Signals you can connect to the thermometer in the app via Bluetooth or WiFi, you have four probes, a data-rich display screen, nice backlighting, and a magnetic holder.
So these thermometers are very much alike, the differences that might swing your decision on what to buy are the accuracy. Signals claim an accuracy of 1.8F whereas the Inkbird can be as high as 3.6F. Not a big difference but if you are a competition BBQ’er this might be the difference between 1st and 2nd.
The Signals also has a water resistance rating whereas the Inkbird doesn’t. But for these small differences, you will be paying twice as much for the Signals. Only you can answer if that amount of money is worth the extra accuracy and the thermometer being splashproof.
Check our full Inkbird IBBQ-4BW review.
Thermoworks Signals Vs Inkbird IBBQ-4T
As I said, Inkbird makes lots of quality thermometers, so having two to compete with the Thermoworks Signals is no surprise. This time the competition is the slightly slimmed-down version of the IBBQ-4BW we just looked at – the Inkbird IBBQ-4T.
Most people will not need both Bluetooth and WiFI, one or the other will do perfectly fine for 99% of users. And with that in mind, Inkbird has just added the more advanced WiFi option to this model. Cutting out Bluetooth. The benefit of this over the Signals is a much smaller, easier-to-use thermometer that is even cheaper that the previous Inkbird unit we just talked about. I think this is the best value WiFi thermometer you can get.
Thermoworks Signals Vs ThermoPro TP930
ThermoPro is another quality thermometer brand, but they operate more in the budget-friendly thermometer marketplace. However, this doesn’t mean their thermometers aren’t of great value for money. At approximately a quarter of the price can the ThermoPro TP930 really be seen as a competitor to the Thermoworks Signals? Yes. and here is why.
ThermoPro has decided to strip away as much as it could from the transmitter unit, letting the app do most of the heavy lifting in terms of displaying data. They also removed WiFi, which is the most expensive of the wireless options. Just keeping Bluetooth which is plenty good enough for most pitmasters. Doing this means ThermoPro has made big savings in manufacturing, which they have passed on there customers. So this unit gives you much of the functionality of the Signals at a fraction of the price.
If you want more info on the ThermoPro TP930 have a look at our in-depth review.
Thermoworks Signals Vs ThermoPro TP27
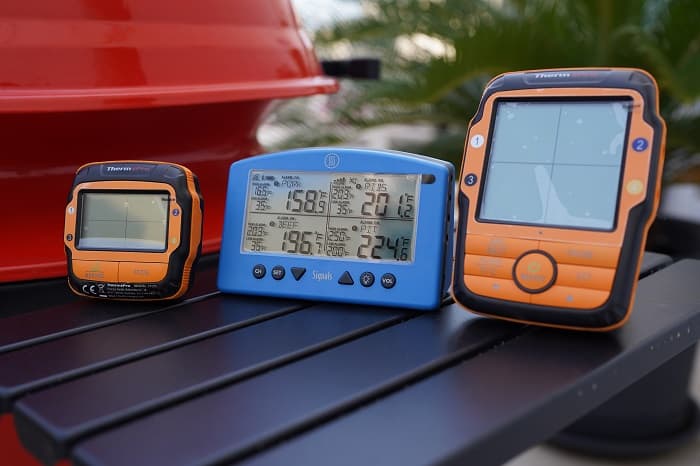
The ThermoPro TP27 has gone down a completely different road compared to the Thermoworks Signals in terms of wireless connection. The TP27 competes against the Signals in that it tries to take the customers that aren’t very tech savvy and don’t want to have to set up apps, WiFi, and Bluetooth.
How have they done this and are still deemed a wireless thermometer? They have used the age-old tech of radio frequency. And to get around not having an app the TP27 comes with a separate receiver unit you can clip to your belt that comes already paired with the main unit. So if you don’t want the hassle of WiFI, apps, and Bluetooth then the TP27 might be for you.
I’ve done a full review of the ThermoPro TP27 you can read here.
Final Thoughts
As is always the case, if you want a quality product, you must dig deep into your pockets. And this is no different for the Thermoworks Signals. Would I recommend you buy this thermometer? I would never talk anyone out of buying the Signals, that’s for sure, it’s an amazing thermometer. The only question I’d ask is do you need a thermometer of this quality?
If you only grill once or twice a year, then it’s overkill to buy a thermometer like this. And if you are just starting out on your grilling journey and funds are a little tight, then I’d recommend you buy a cheaper thermometer and use the saved money for other grilling accessories. But if money isn’t tight and you have the other gear you need then I’d 100% recommend forking out for the Thermoworks Signals.